Did you know that March 31st is the World Backup Day? Yep, you read that right. Introduced first on August 5th, 2005 by a hard disk drive company called Maxtor, it was primarily thought as Backup Awareness Month and later it developed March 31st as the World Backup Day by Ismail Jadun.
This annual event is meant to serve as a reminder that you should back up your data before you lose them either by accident or by malicious events.
But Backup Data Day should be every day, with organizations, businesses or websites hanging more and more by the thread of bits and bytes, the pace of hacks and breaches has hastened and cyber threats have become ancillary, consequently, the value of data has significantly increased and the need for continuous data protection, file backups and ensured system restoration.
I feel like by now pondering over the questions as to why data backup is important or why you should backup your data have long been gone. It is time to resonate on which backup plans and solutions fit me best. Here to help you with that is this article.
Why Should You Backup your data?
Here are some statistics just to convince those who are still sceptical about backing your data ( if there are any).
93% of companies that lost their data center for 10 days or more due to a disaster filed for bankruptcy within one year of the disaster. 50% of businesses that found themselves without data management for this same time period filed for bankruptcy immediately. (Source: National Archives & Records Administration in Washington)
According to a Global Risk Report, 2026 said that fragmented cyberspace threatens the full potential of next-generation technologies.
Before we dive into the tutorial on how you can backup your WordPress site let’s set the distinctive feature of backup and disaster recovery since many people believe these two are synonyms.
Backing up data is a process that implicates case of copying your files and database which then you can use to revitalize the original copy in the event of data loss, whereas on the other hand data recovery is the approach a company or a business together with a set of tools and procedures puts into play to respond quickly and proceed business activity in case of a hazardous event.
Narrowing down to our topic, WordPress does not come with a built-in backup solution. But, not to worry since there are severe possibilities that provide you with data backup.
You could either choose to back up your WordPress website manually ( either using the Cpanel or FTP ), but the downside is that some hosting providers do not have Cpanels integrated and the work from there is just too much to handle for non-techies who don’t know their way around coding and you can easily end up messing your website badly.
Here to your rescue are some great WordPress plugins that will help you finish this process seamlessly and with no effort, you can even restore and automate your backups regularly.
For the purposes of this article, we are going to use the UpdraftPlus plugin, one of the best WordPress plugins on data backup. How do we back up our data with such bold statements? (See what we did there).
UpdraftPlus not only has over two million active installations, but it also has the best ratings and reviews out of all backup and restoration plugins on the WordPress repertoire.
It offers a quick and easy solution, with a quick installation process, automation backups, it works by backing up your website directly into the cloud offering more options than all of its competitors including Dropbox, Google Drive, Amazon S3, RackSpace Cloud, DreamObjects, OpenStack Swift, Updraft Vault and Email, all of these possibilities for a free version. Signs us up. Let’s get started.
Step by Step: Arranging UpdraftPlus to backup data and How to use it

Step One: You need to install UpdraftPlus on your WP Dashboard, it’s a simple process, just navigate to Plugins > Add New, type UpdraftPlus in the search bar, once you locate it, click Install and then Active it, for a more in-depth tutorial check out our article on How to Install a Plugin. If the plugin shows on your WP Dashboard that means you have successfully installed it.

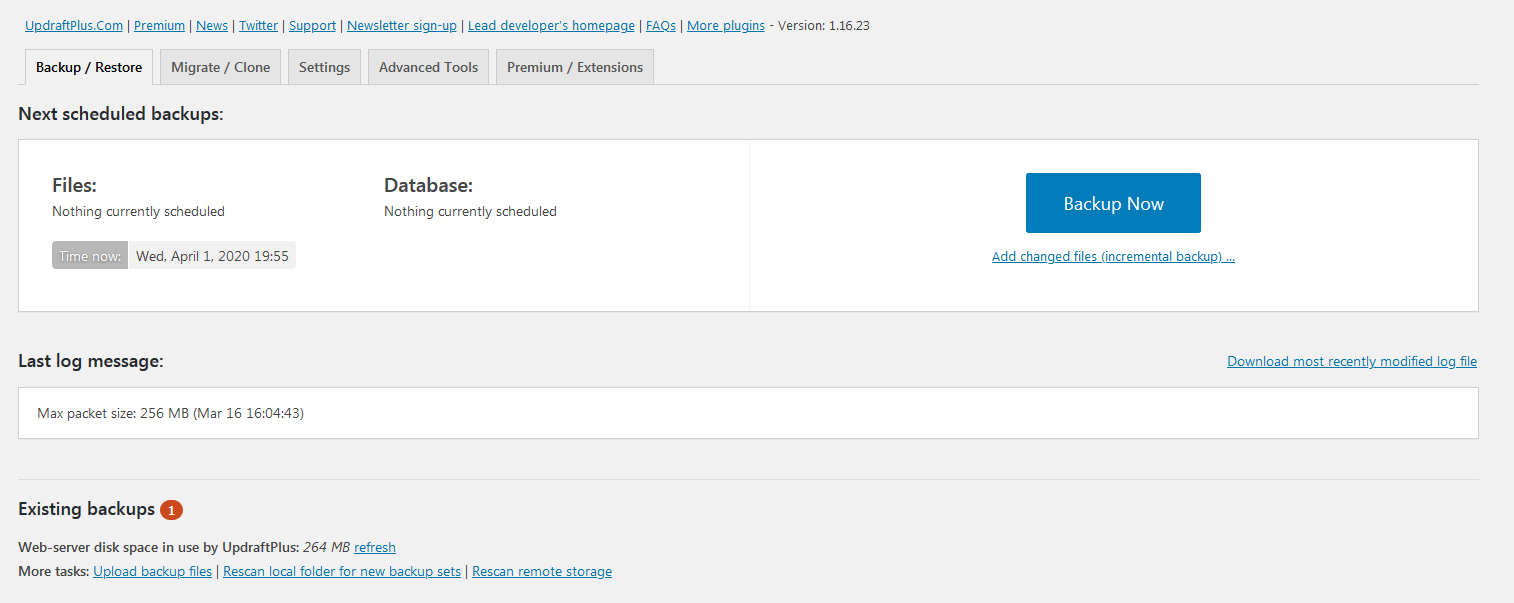
Step Two: Being done with the installation you can find the plugin under WP Dashboard panel Settings > UpdraftPlus Backup. Once you click on that option you will be presented with the configuration window that holds all the options necessary and beyond. You will have a ton of tabs each containing specific activity.
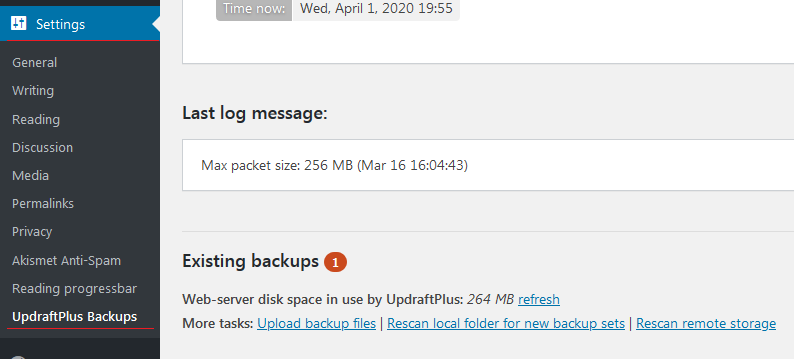
Click on the first tab Backup/Restore, here you will have all the information you need for your files and database and existing backups since this is a fresh installation those fields will be empty.
Step Three: Next on we will proceed by clicking on the Backup Now button. Now you have to tick the boxes on what you want to include in your backup meaning tick first and second to include the files and the database during the process (the third box will be enabled if you choose to send the backup to remote storage) and click Backup Now once again and wait for the adjustments to be made accordingly, you just have to wait for the progress bar to upload fully, the timing depends on the wealth of your website’s content.
For successful backup, you should be greeted with a positive note that your process has finished.
Step Four: Although backing up your data manually with the UpdraftPlus plugin is so smooth and straightforward you can have this plugin to automatically upload it to a remote storage location. That would comprise scheduling the backup.
This is simply done by first clicking on the Settings tab and setting the intermission value you can choose from the drop-down menu, it can be every 2 4 8 12 hours, Daily, Weekly, Fortnightly, Monthly. The same procedure should be followed on both the Data Backup Schedule and Files Backup Schedule.
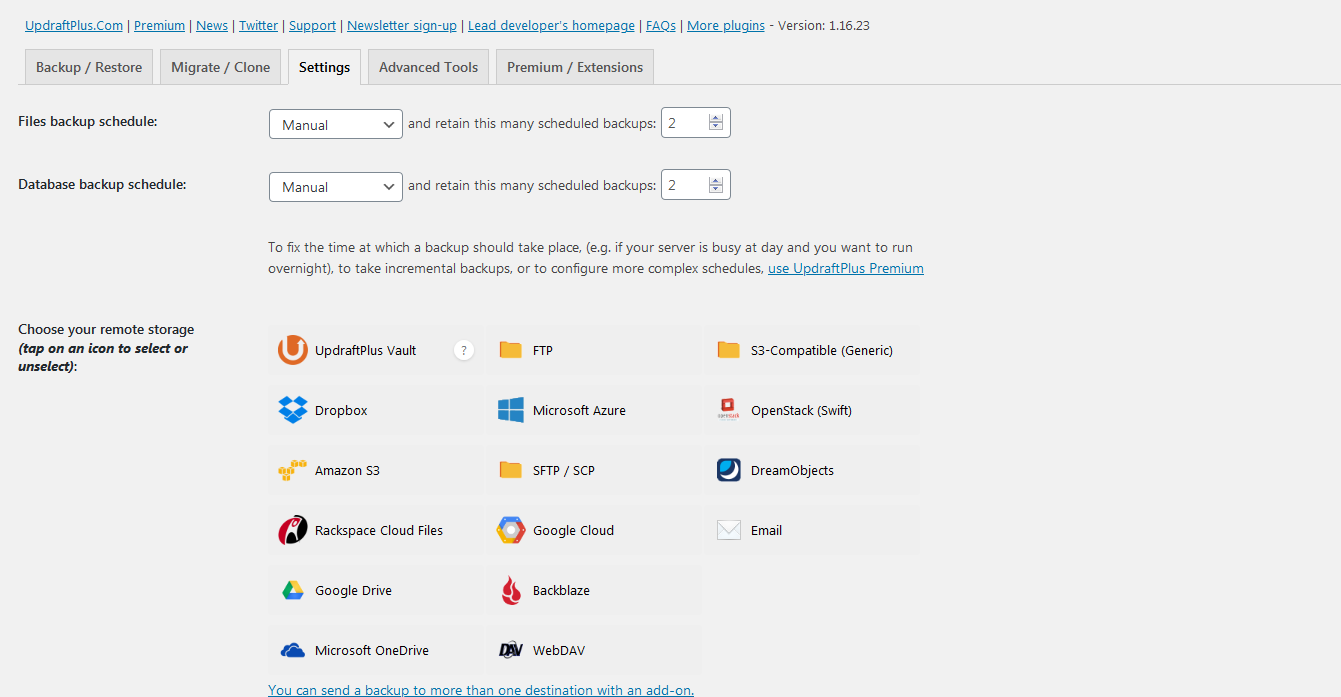
Step Five: This next step encompasses uploading your backup data to remote storage like Dropbox, Google Drive, Amazon S3, RackSpace Cloud, DreamObjects, OpenStack Swift, Updraft Vault and Email with which UpdraftPlus plays pretty well.
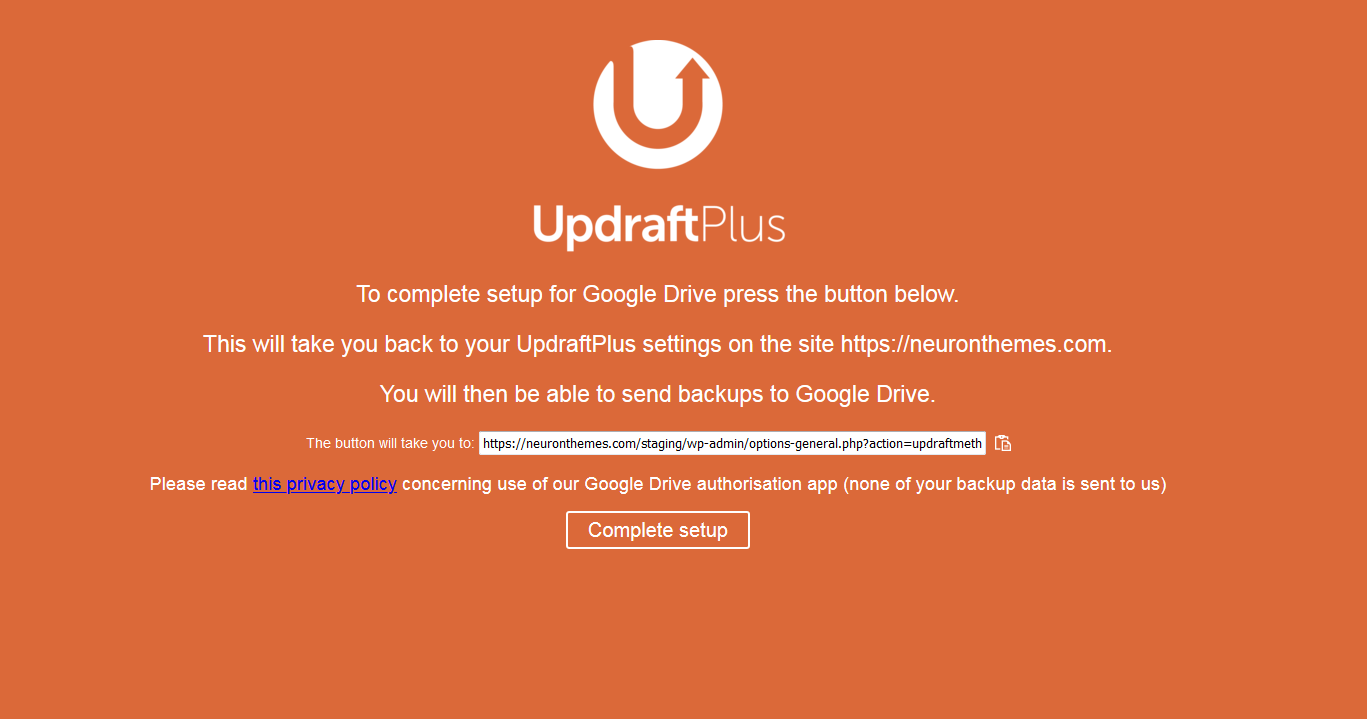
Better safe than sorry they say, so to get started click on any of the units you wish to upload your data to. Whichever one you choose, the integration settings will then appear further down the page with its own unique options. For this article, we are going to proceed with Google Drive.
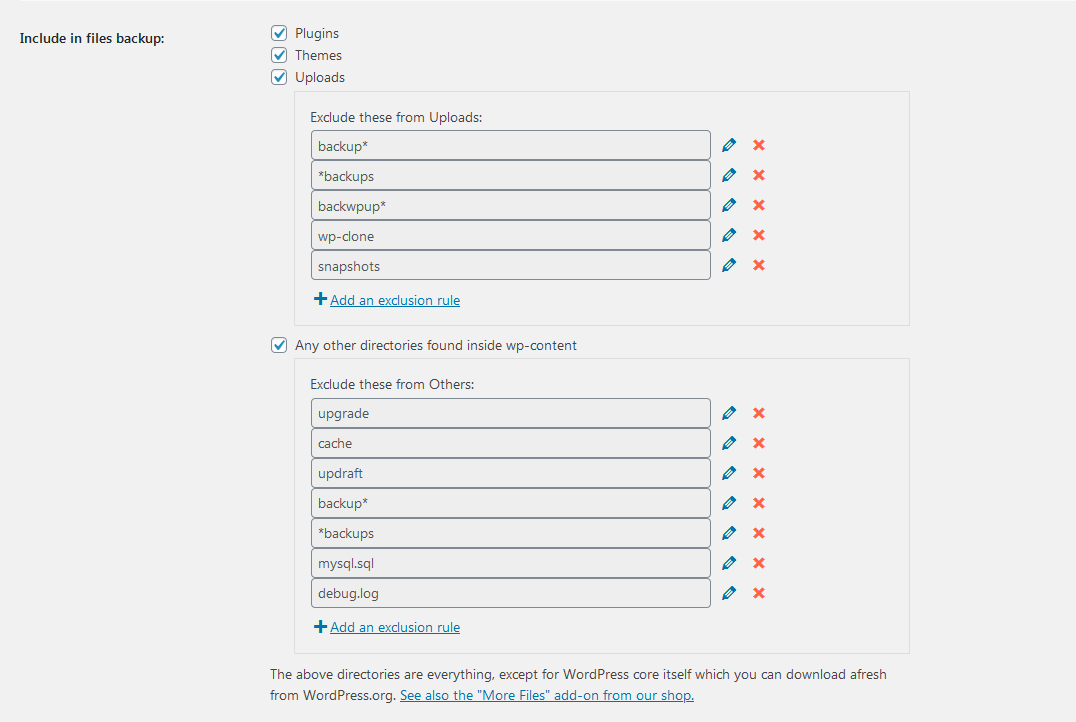
Step Six: Further down the page you will have the options to include or potentially exclude files like Plugins, Themes, Uploads or directories found inside wp-content.
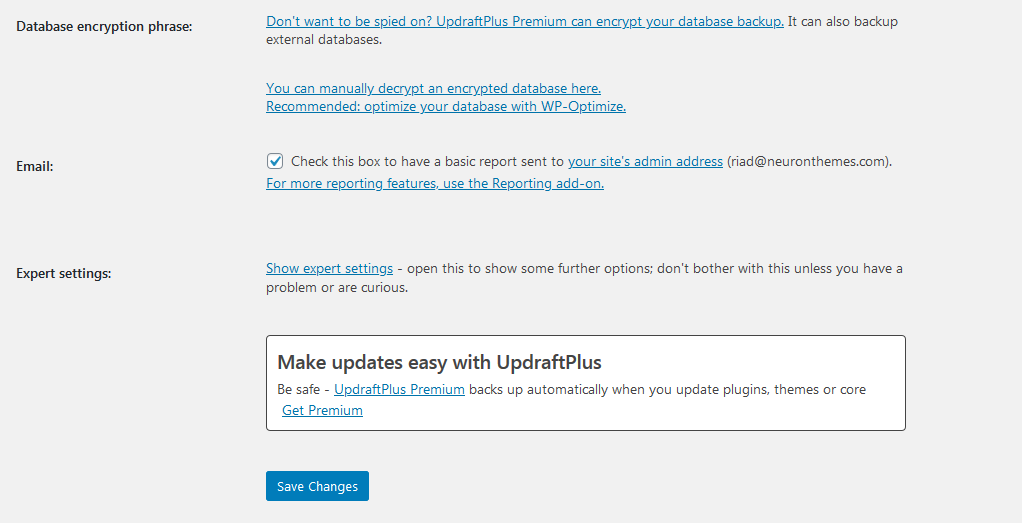
Upon the Uploads file, you can as well include an extension rule, or exclude files with a certain extension. This is just explanatory, to proceed further you scroll down the page and click on Save Changes.
Step Seven: Once you click on Save Changes you will be notified with a link that will be directed to Google’s sign-in page. Sing in there with the account you want to link your backup process. Click on Allow to complete the course.
Now all there is left to do is click on the Complete Setup button and you will be synced.
Note: The free version of UpdraftPlus allows you to send your backups on only one remote storage, If you wish to spread your backups on more than once remote location you will have to upgrade to the Premium Version, which will have many more cool additions.
Restore your WordPress Site Backups
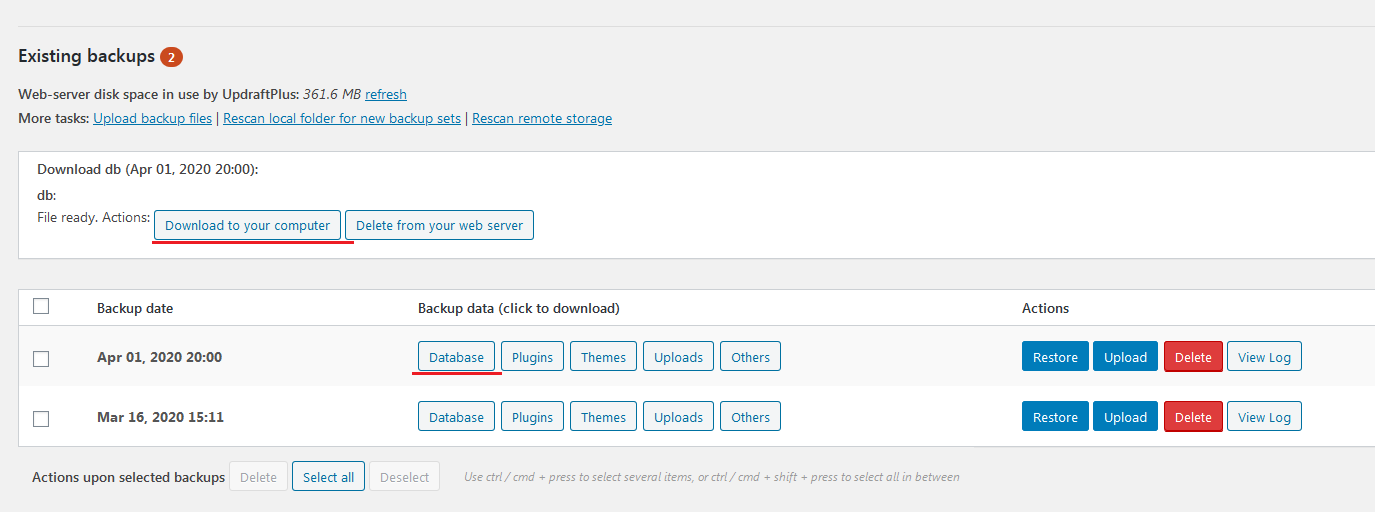
After you have prosperously completed the backup procedure and after our website is regularly backed up, you are on the safe side knowing you can retrieve it any time something goes the wrong way. Remember how on the Settings > UpdraftPlus > Backup/Restore tab when we first started there was nothing under the Existing Backups section. Well here is where all your backups will appear for you to restore them.
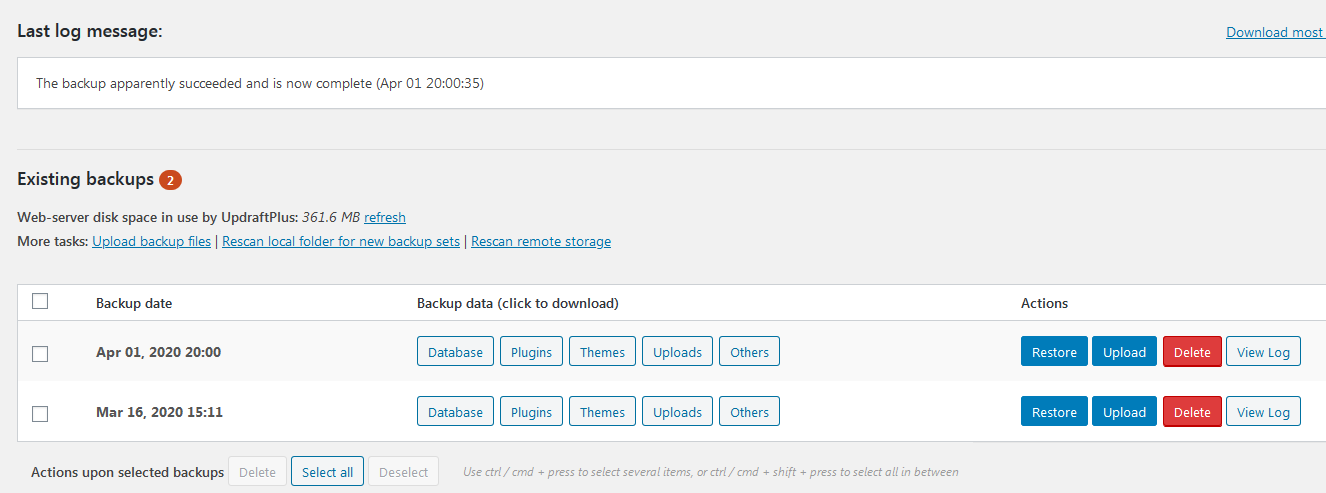
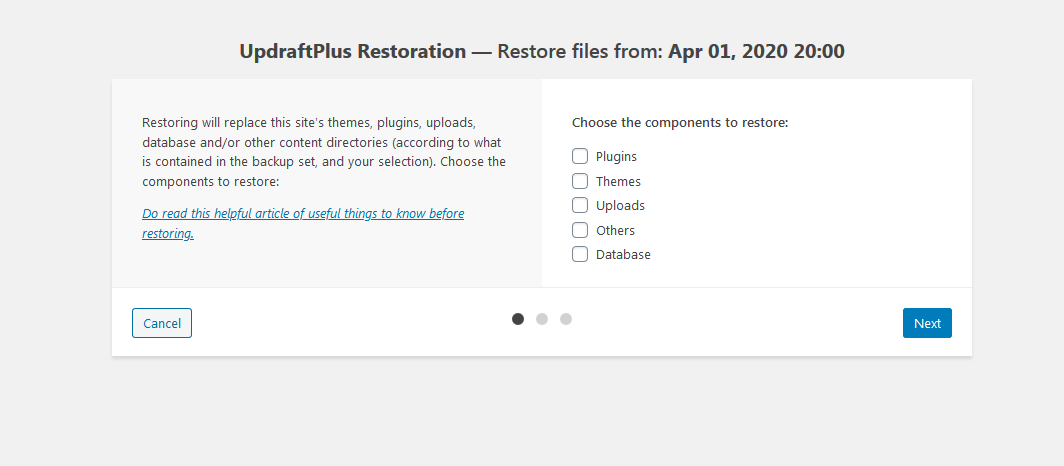
Here you have all the information such as the Date, Data containing Database, Plugins, Themes, Upload and Other and the Actions to Restore, Upload, Delete or View Log. Click on Restore under Actions.
Afterward another window will open requiring you to choose which of the following components you want to restore.
Note: that when restoring the backup, it will replace this site’s themes, plugins, uploads, database and/or other content directories (according to what is contained in the backup set, and your selection). Select the elements you want to be restored and click on Next
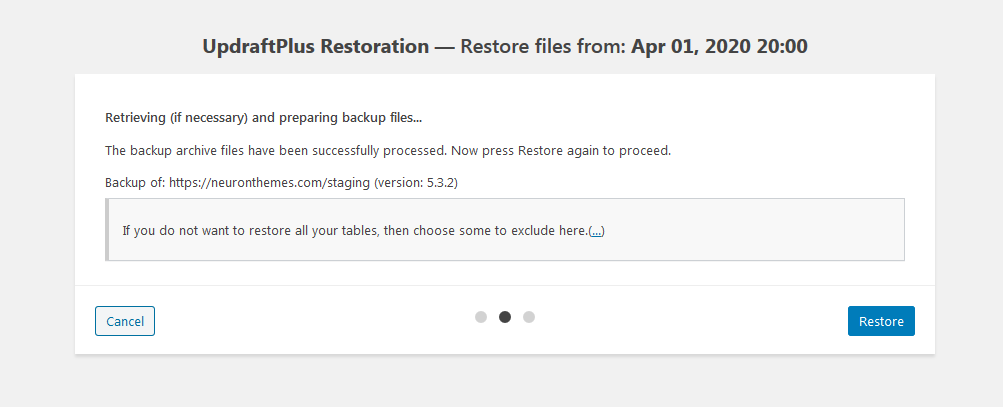
Next on you will be greeted with a successful message and click Restore. Wait until the process is completed and head back to our dashboard.
That would be all on how you can restore, with this plugin you can download your backup files to your computer. I will show you how.
All you have to do is click on the buttons containing Database, Plugins, Themes, Upload or Other. By clicking on either one boxes will open a box with two options to Download to your computer and Delete from your web server.
Click on the first option and it will instantly begin to download on your PC. Similarly, you can download all other files.
Final Judgment
I raved about the importance of backing up your data and files a lot in the introduction of this article and we felt compelled to show you how you can outright this vital and paramount step that will keep the pace of your workflow steady and intact from hacking, updates gone wrong and server crashes.
We even simplified the process, so there is no excuse for anyone not to perform such a crucial act. Using the Updraft WordPress plugin will have you all hands on deck where you can keep all your files safe, restore them or choose to have them automatically backed up. It is a miraculous handy widget to keep at any time.
We always take into consideration all your comments, critics or recommendations so feel free to speak your truth and tell us yours. Or you could give us some horror stories gone wrong and provide some advice/insights for others. Be safe