The rise of the Internet has captured every aspect of our everyday lives, and each time we tend to incorporate personalization on every device developed. While websites are digital creations, by including a live chat software that allows the intercommunication of you as a website owner and your visitors or potential clients, you will also provide a sense of humanization onto this technological tool. As a website owner, it is of vital importance to provide only the best user experience for your visitors, and live chats have proven to be quite effective in increasing leads and conversions.
You will be able to provide fast and effective responses to your visitors and potential clients, and they’ll be satisfied with the experience you are providing for them. This makes it more likely for these clients to refer your website to others as well as come back again and establish themselves as loyal customers. For this article, we’ve compiled a guide on how to add a live chat system to your WordPress website. It requires little to no skills to set up and add a live chat functionality and configure it to match your site’s design.
Benefits of Adding Live Chat to your Website
If you add a live chat system to your website, unlike support tickets, or emails, they provide a simple and straightforward solution to communicate with your clients in real-time. You can provide them with the necessary solutions and it only takes them a few clicks to get the help they need without ever leaving your site. But besides this, there are plenty of reasons to add a live chat plugin to your website that will prove to be a successful move towards your goals.
Your visitors/clients get instant service
Having an online business has its perks of course, but the disadvantage to physical businesses is that you don’t have a salesperson that is going to help your clients make sense of your products and assist them with any question they might have. To replace this experience, that is where live chat providers come into play.
When providing an online service that is always going to be there to answer every single of their questions without having to open another tab, is just wonderful. They can get the clarence they need, whether that be a pre-sales question, or how to fix a certain they that they’ve run into. They will be able to get back to their work in time and you will have provided them with a solution quickly and effectively.
Improves the service experience
Your website should reflect your products or services. It does not solely have to be promotional, you can nurture other aspects that will improve the experience of your visitors and clients. By providing more than one alternative, you are providing diversity. Because some people like to communicate via phone, some like to communicate via email, while others would prefer they had the opportunity to ask you some rapid question right there on a little chatbox somewhere.
If you are providing all the different channels where your visitors and clients can reach you, you are giving them the possibility to choose their best approach, which translates into a good user experience. If you add a live chat on your website, you are thriving in interactions between you and your possible clients who would like to be answered to their pre-sales questions, or established clients who need a quick fix on some issues they’ve encountered.
Convenience
Adding a live chat service to your website will allow for greater convenience for both you and your users. When it comes to providing top-notch customer service, accessibility of the support tea, as well as timeliness of your response are the two main priorities every webmaster should take care of in order to provide the best user experience.
And live chats will fill in both options of the equation, by always being in communication with your clients and visitor in an immediate fashion. This way they don’t have to wait long times of phone lines for customer support, The chat rap will indicate whether or not your team is at their disposal. This removes this bitter experience out of the equation and leaves your clients with satisfactory
Gather leads and data
Step out of the ordinary means of email marketing lead generation tools, of course, a subscription form will work wonders n your website to gather prospective clients and customers, but it wouldn’t hurt if you actually have more than one source of generating leads. With the live chat service included on your website, you can gather information about your customers, which will serve as data to run analysis on certain marketing campaigns and also create omnichannel content that resonates with your audience.
How to Add a Live Chat to your WordPress Website?
Now it’s time we add a live chat functionality to your WordPress website. We will provide a step-by-step tutorial on how to achieve that, just follow us along. We will be using the help of a plugin, thus this process won’t need to necessarily be done by professionals, even beginners can easily get the hang of it.
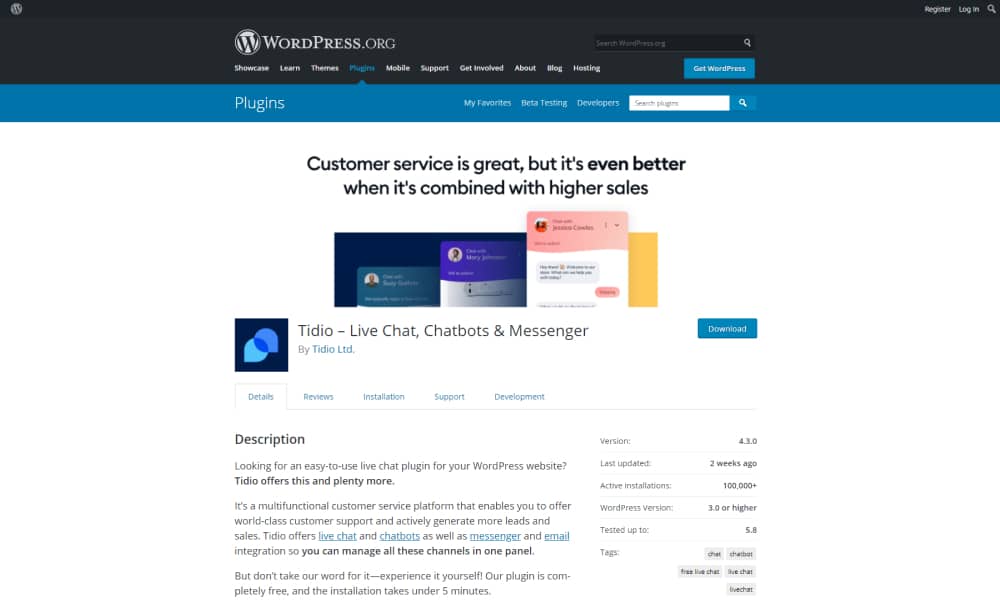
While there are many live chat plugins available in the market, for the purpose of this article we decided to show you how to add a live chat function to your website using the Tidio Live Chat provider. They offer a free plugin in the WordPress repository that is very popular and powerful.
Step One: Install the Plugin
To begin adding a live chat to your WordPress website, you must first install and activate the plugin from the WordPress repository. As mentioned, Tidio provides a free live chat plugin for WordPress users to integrate the live chat functionality to their website. They also provide some powerful tools and features, but you will need to upgrade your plan to one of the premium packages. However, if you are serious about adding a live chat plugin, it’s worth your penny.
Step Two: Create an Account with Tidio Live Chat

You will then be prompted to create an account with Tidio, simply provide them with your email address, create a new password, type in the URL of your website, confirm you agree to their terms and conditions, and click on the Create a Free Account button.
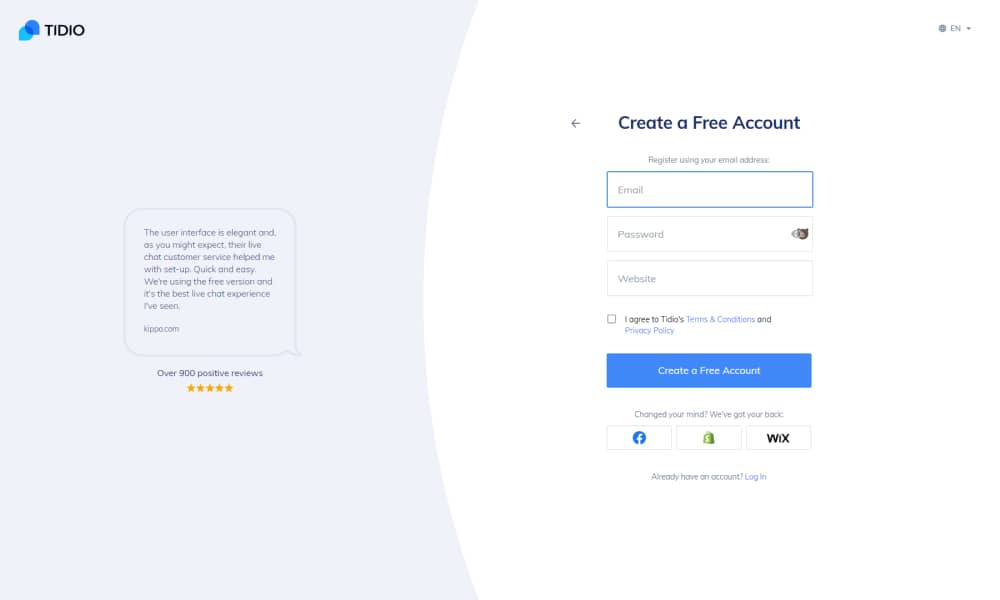
It’s really that simple. You will then be prompted to customize the look of your live chatbox, you can type in a custom name, change the chat color, and all the other default configurations. Once you’ve set everything up and you are ready to add a live chatbot to your website without much hassle.

You can also create more personalized live chat functionality with Tidio if you provide them with the necessary information about your website/company and your site’s goals. Select the size of your team, your niche business, as well as the objectives you wish to achieve with Tidio where you can select more than one, whether that be customer service, increase sales or automated conversations.
And lastly, you’ll be asked as to how you want to add a live chat box to your website, you can either install the code yourself, or you can send instructions to your developer, just click on Continue. And this is where our WordPress plugin comes into play. Now we are ready for the next step.
Step Three: Connect your Tidio Live Chat account with your website
After you’ve followed the main instructions with Tidio o their website and have successfully created your account, you will be directed to the Tidio dashboard interface. To connect your WordPress website with your Tidio account, you will need to head over to the WP Dashboard and locate the Tidio Chat option in the left panel and click upon it. Here you should see an interface where it requires you to insert your email address and password of your Tidio account. Do as it says and log in to your account.
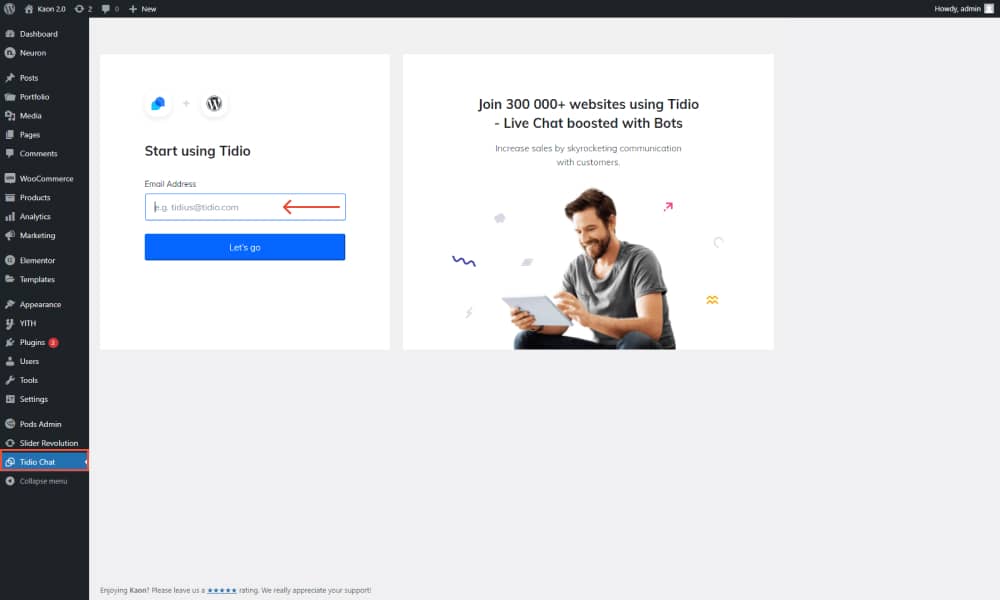
You will be asked to connect your website to the Tidio account and access your chat panel, just click on OK to continue.
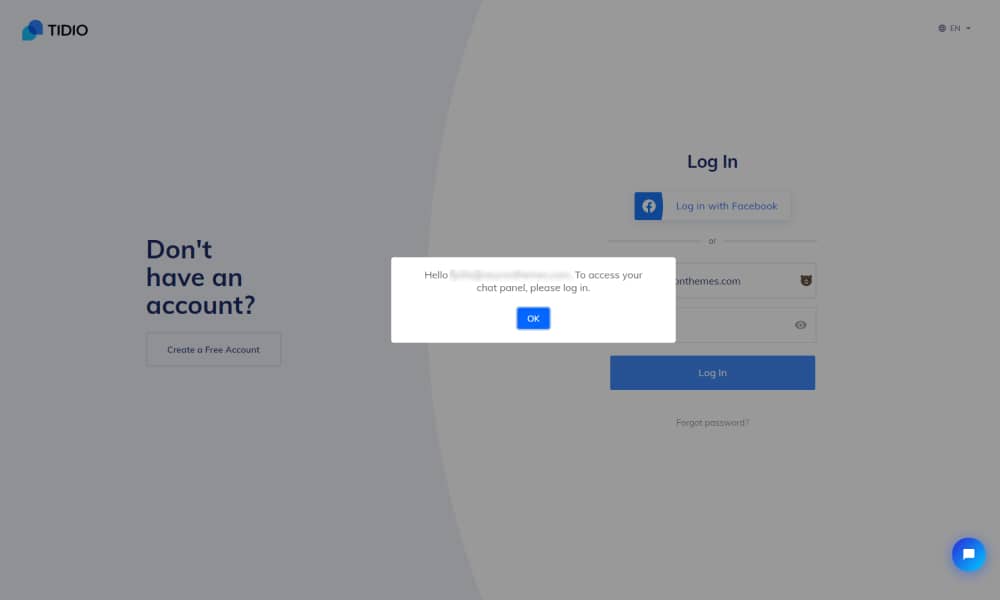
Log in with your credentials, and this will redirect you to the Tidio Dashboard from where you will tweak all the main configurations from this interface. You will be able to manage all the chatbots you create as well as add more operators.
Step Four: Customize the design of your chatbots
From the Tidio live chat interface you can manage all the customizations and configurations you need to make as well as run analysis, all from one interface to track and be in charge of every component on your live chat. The good thing about Tidio is that it provides a simple and intuitive interface, meaning you won’t have any problem getting the hang of it, even if your capabilities don’t include any knowledge of code whatsoever.
Tidio Live Chat provides you with the power to customize and design your live chat interface so that you create a coherent brand design applicable to every site component, including your live chatbox. To begin the customization process and design click on the cog icon at the bottom right toolbar.
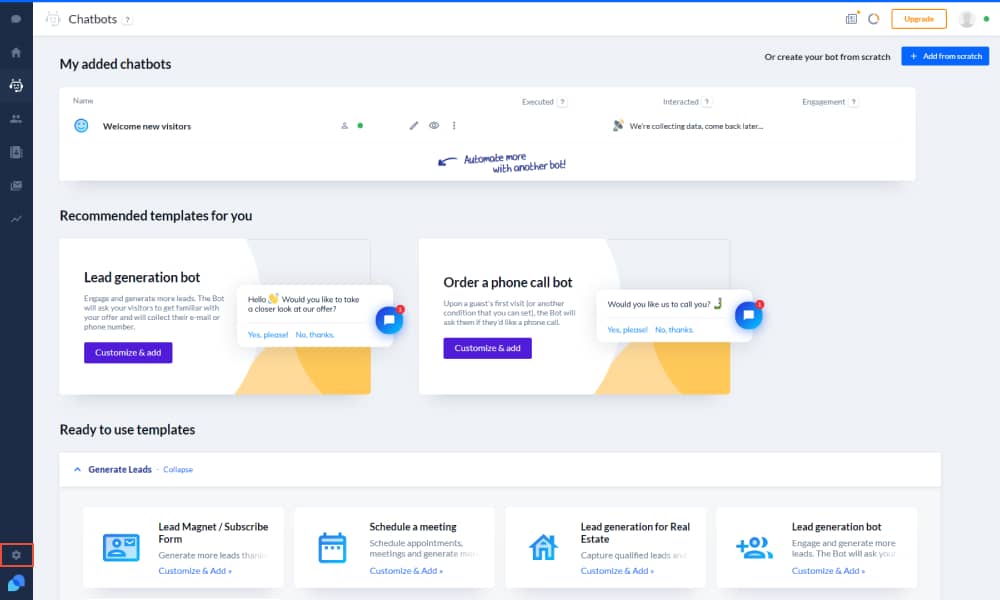
There’s a ton of customization possibilities that Tidio provides. We will cover all the areas to which you will design your brand experience while providing support or answering pre=sales questions to your vsitors/clients with ease.
This will create a sense of personalization as well as convey trust among your users. We will begin first with the Appearance tab. This is where you configure all the main settings on how the live chat icon will look like.
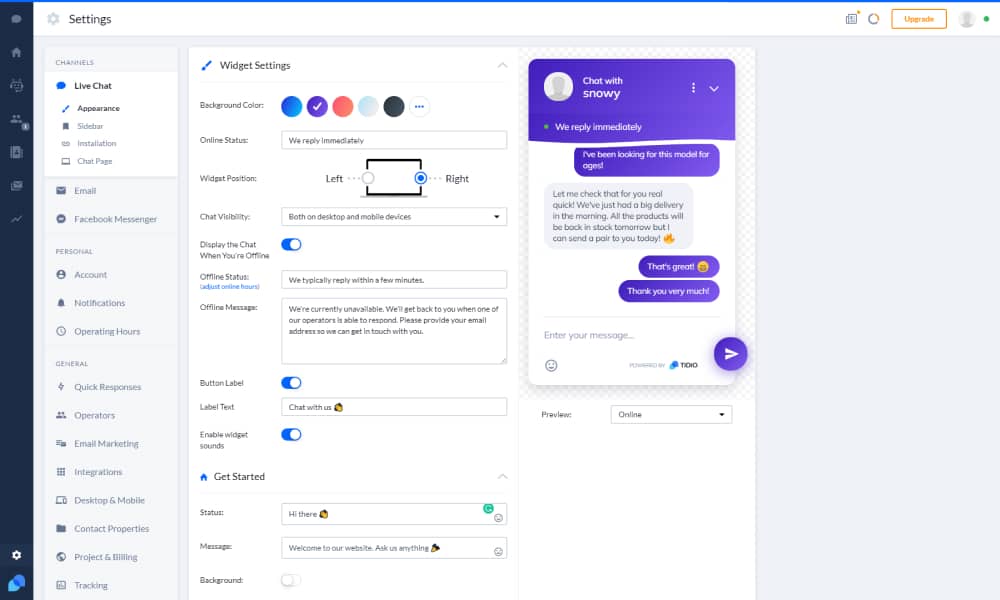
You have already learned how to add a live chat functionality on your website, and have established your live chat service following our step-by-step tutorial. Now it’s time you own up the designing of the live chat. From the Appearance tab, you can:
- Set the background color of the chat and the live chat icon. You can use their preset color designs which introduce beautiful gradients or add custom colors that match your brand.
- You can also customize the text for the online status to notify when you are available to answer questions.
- Choose to display the chatbox either on desktop, mobile or both
- Write a custom offline status for when you are not available to answer customer’s questions
- You can choose to include the button label as well as write a custom text to entice users to engage with your live chat
- Enable the widget sound to wake all senses of the users that notifies a live chat box is present on the website
- Edit and customize the live chat appearance on mobile devices as well, you can choose the position either left or right as well as the button size to make sure you are conveying the rules of responsive design
Once you are done with customizing the design of the chatbox, click on the Save button for the changes to take place. You can also add your site’s logo into the chat to attribute your brand on the chat page as well. To do that click on the Chat Page option. From the right sidebar, under Company Logo upload your site’s logo and you’ll see its appearance on the chatbox immediately
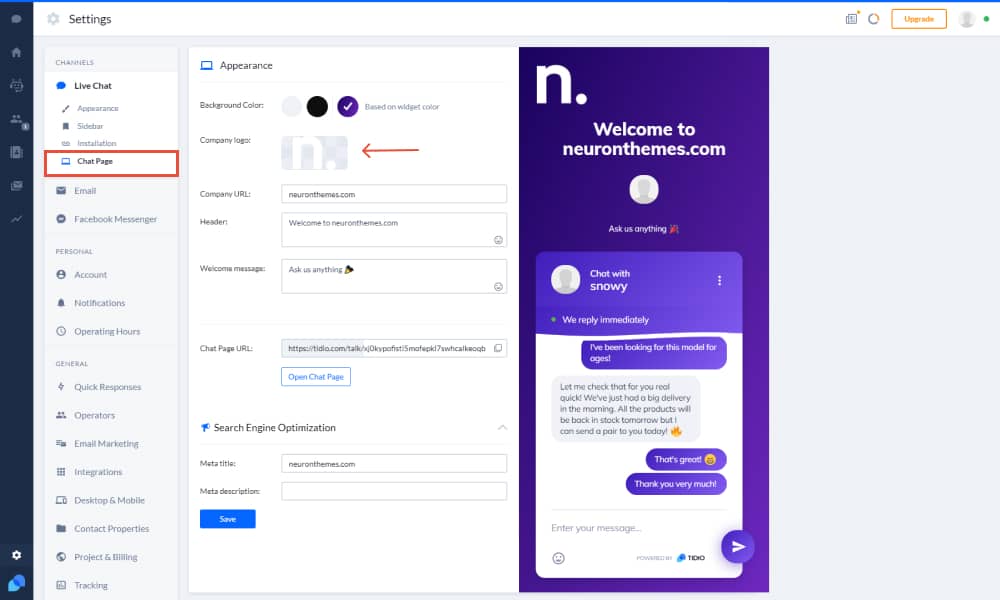
Under this tab you can also customize the company’s name, website URL, you can type in a custom header to welcome clients/visitors who wish to engage with your chatbox. You can configure all the settings available with Tido Live Chat to provide only the best experience for your users as well as provide them with quick and effective solutions at any time. Once again click on the Save button for the changes to take place.
Step Six: Add operators to your live chat
Depending on the number of your support team you can create up to three operators within your free account capability in Tidio Live Chat. If you intend on having more that one operators handling requests and questions from clients and visitors on your website you can easily increase the number of operators on your website. To do that from the main Tidio dashboard click on the profile account picture to open the settings. From there you should see a list of information on your operators, your online status as well as your website (project). Click on the Add Operator button.
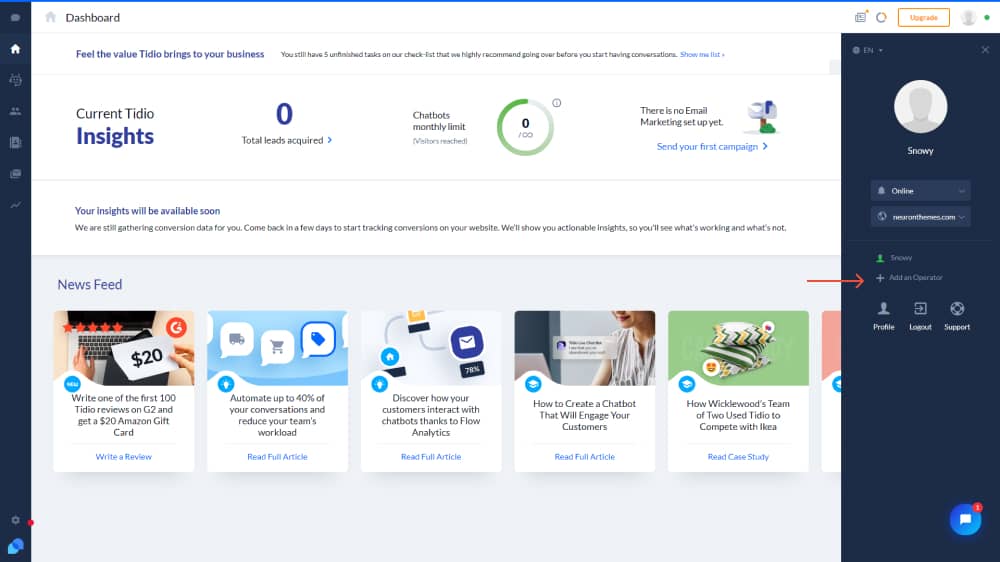
You can alternatively reach this tab if you click on the cog icon to open the chat settings and from there click on Operators. This window will allow you to add more than one person from your support team to answer your client’s requests. Click on the Add an Operator button.
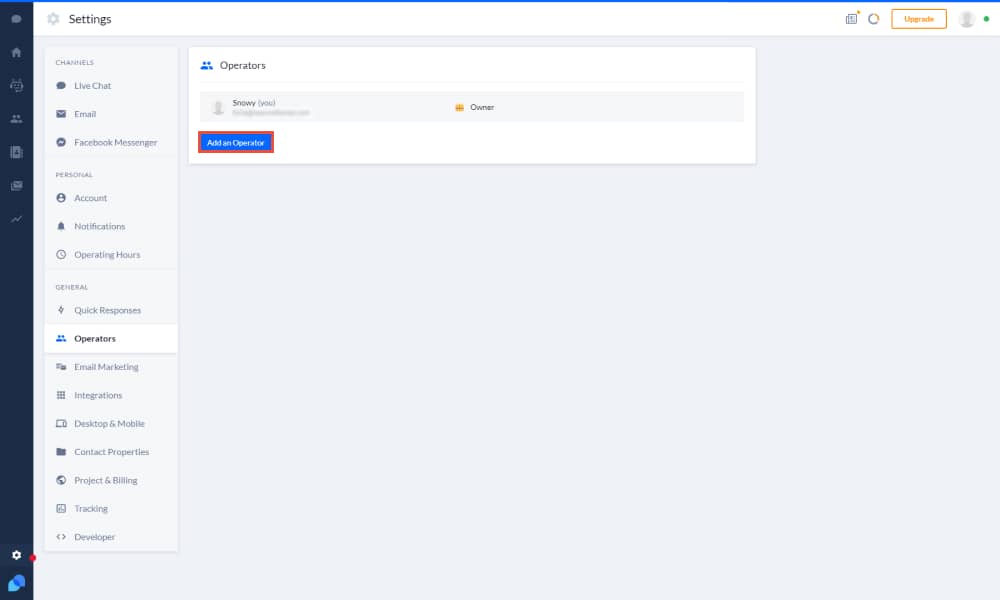
This will open up a new window from which you can add your new operators. You will be prompted to include the operator’s name, their email as well as assign their permission. From the permission tab, you can assign the operator to either be an admin, a moderator, or a chat agent.
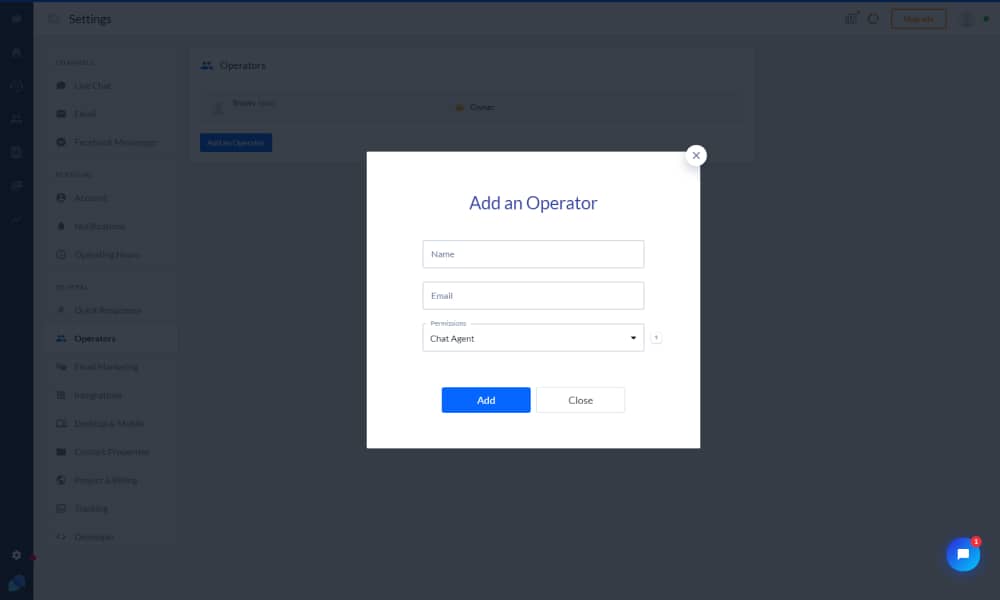
Once you are done with filling in all the required information and you’ve set the proper permission to add a live chaat agent on your website, you can click on the Add button to continue. This will take you to the Operators tab from where you can see all the agents working on your website as well as their online status and their information. You can easily edit their permission or delete an operator.
Step Seven: Test your live chat and start chatting
At this point, you will be ready to start communicating and chatting with your clients, as you’ve successfully added the live chat functionality to your WordPress website. You can keep up with every request of every visitor coming to your website and appeal to their questions with a powerful live chat service that’s so flexible and customizable where you can design it to the full extent to match your brand’s style guidelines. Note that you can use Tidio for free allowing up to three operators, 500 emails per month, unlimited chats, desktop and mobile chats, and more.
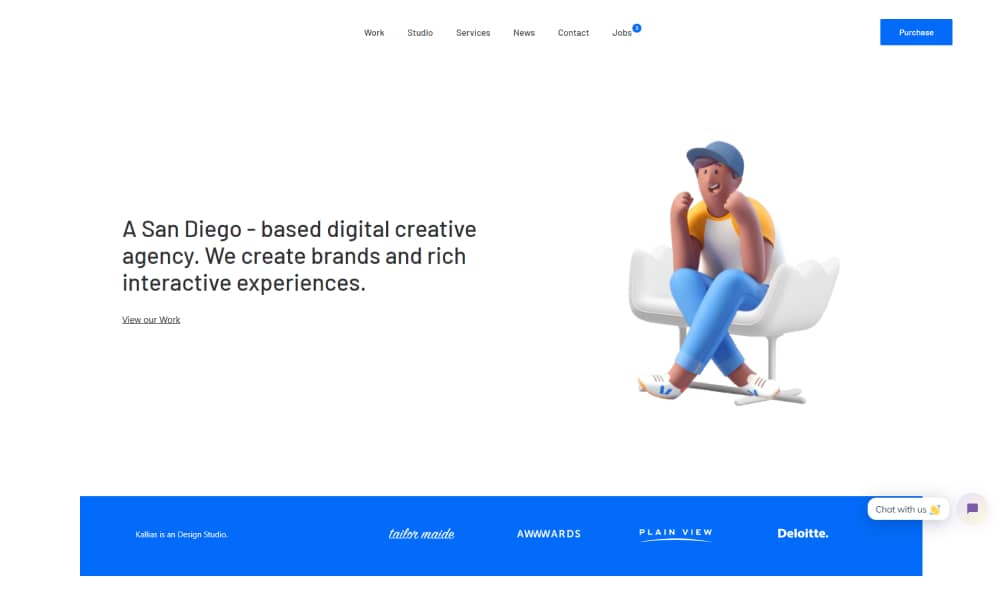
This is great for growing businesses to maintain a healthy relationship with the clients and being at their disposal 24/7 when they need assistance as well as convert new clients by effectively providing answers to their pre-sales questions.
Once your business has grown large, you can always upgrade your plan to one of their premium packages that offer a lot more customizability, flexibility, and advanced features to develop your marketing goals, all from one place. You can also manage your emails and campaigns, all from Tidio, everything in a simple and intuitive interface.
Final Thoughts
This is all from our team, we’ve shared a comprehensive guide on how to add a live chat service to your WordPress websites, using all the simple steps and a super intuitive interface that allows even the most novice user to feel comfortable. We’ve included in this guide the use of a free and powerful WordPress plugin that is Tidio Live Chat to give us all the functionality we need to create a super smooth and engaging experience for all your website visitors. Besides being a free live chat solution.
Tidio live chat also provides all the tools and features you need to set up the chatbox and begin growing your list of leads and clients. You can easily customize and design the chatbox to give it a feeling of your brand’s style. Upload your company’s logo as well as customize the text messages to entice users, keep them engaged, and make them feel at home while communicating with your agents.
Live chats provide you with a greater convenience and user experience while also accomplishing your site goals with much efficiency. We’ve also shared on best tips on how to design the chatbox to make it custom to your website. Leave your impressions in the comments section down below on the best live chat providers and the most effective approach to add a live chat service to your website
