Nowadays with so many advanced search engine optimization, besides great content, you will need much more preparation and state-of-the-art weapons to help you win the battle when aiming for top positions on search engines.
It is a great relief to have the leading tools that will vouch you get the best results. Google is the preeminent search engine everyone claims for, as a ruling authority, its products should be of sterling quality as well.
That is why we will show you how you can add Google Search Console to your website with ease. This goes out to all of you newbies in the WordPress world. I can understand how scary it is to be surrounded by codes and languages you can’t speak (I’m talking programming languages).
What is Google Search Console
We have previously talked about Google Search Console briefly in our How to increase your ranking in Google article, where went went on explaining its constituting component.
But to give it a proper introduction Google Search Console is a valuable tool that will help transform your website for SEO with invaluable insights and reports. With the help of Google Search Console, you can monitor and maintain your WordPress website and keep track of how well or not well is doing in the ranking.
If you know where you stand you will be able to make significant steps towards where you want to go and what you want to achieve. Google Search Console is a free tool and service for the sole purpose of helping you maintain and balance your website’s presence in the Google search engine.
Google indexes every website to offer the best results, and that happens whether you sign up for Google Search Console or not. It is just a measurement tool to improve Google’s perception of your site. Google’s report and insights will serve as a guiding light to reach the top.
Now that we have a basic idea of what Google Search Console is and how wondrous it can be, let’s see how you can integrate it into your website.
- We will first show you how you can set up your Google Search Console Account and add it to your website
- And how you can verify your website easily with a WordPress plugin
This should be a rather easy job, so let’s get to it.
Adding your website to Google Search Console
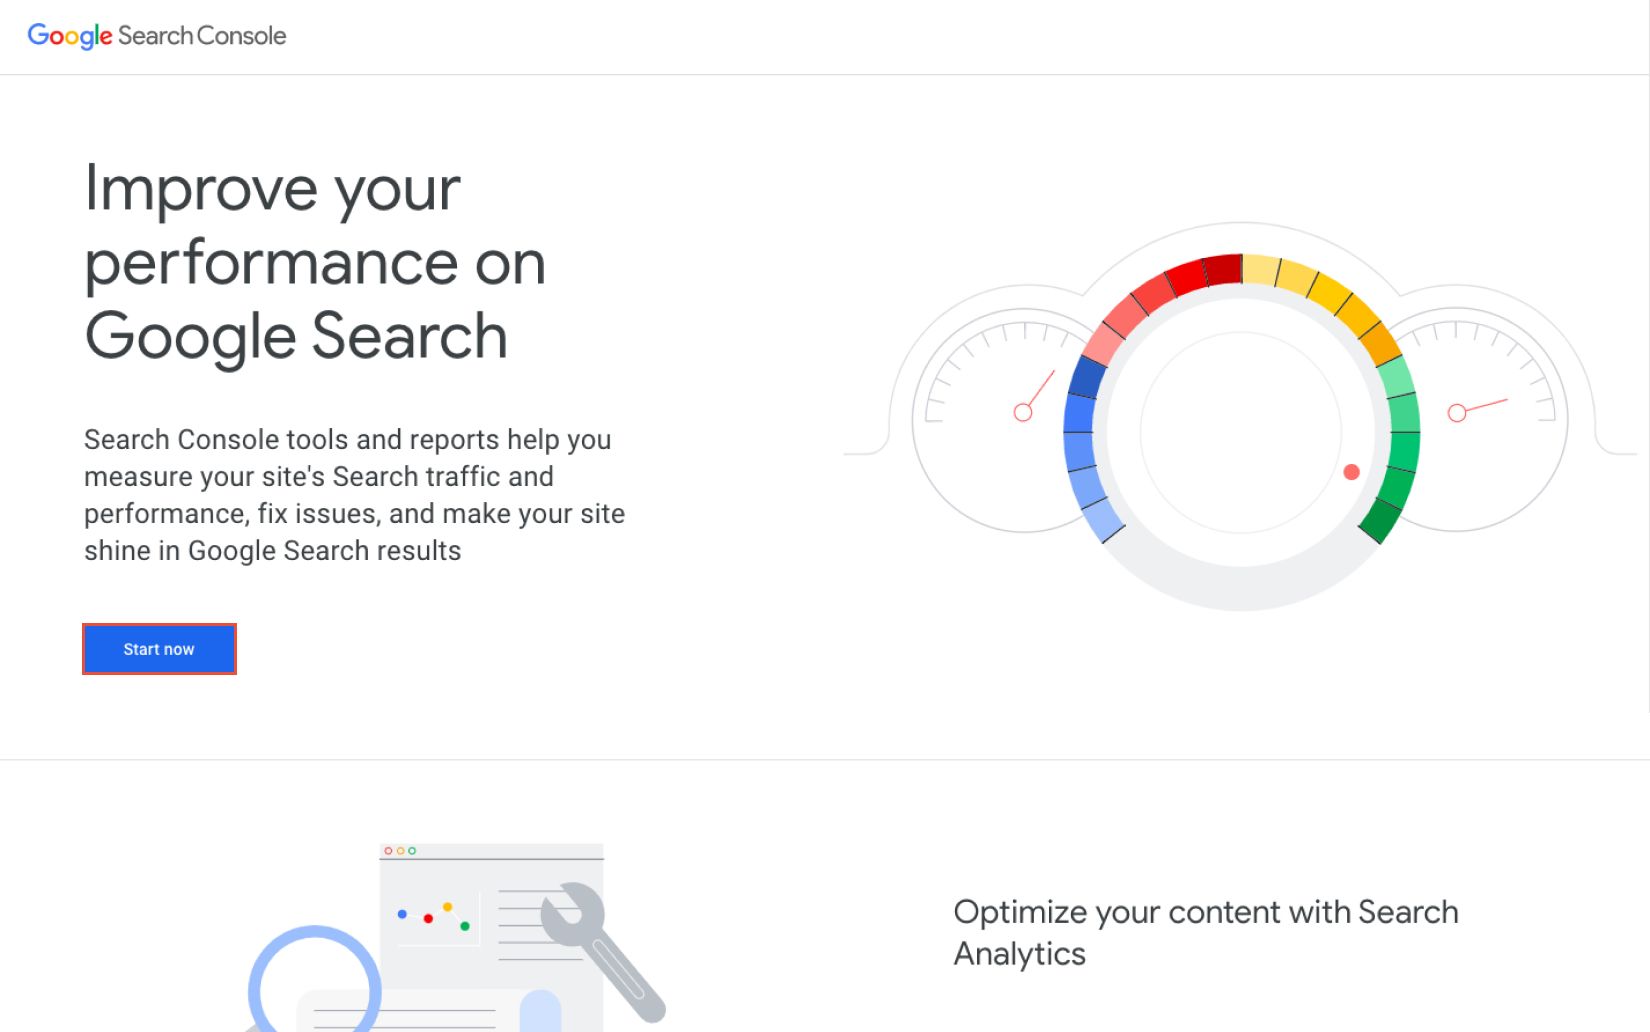
First things first, let’s get the obvious out of the way, to get started you need to go to the Google Search Console page, this is simply an about us page that shows briefly what this tool is. Click on Start Now to connect your site.
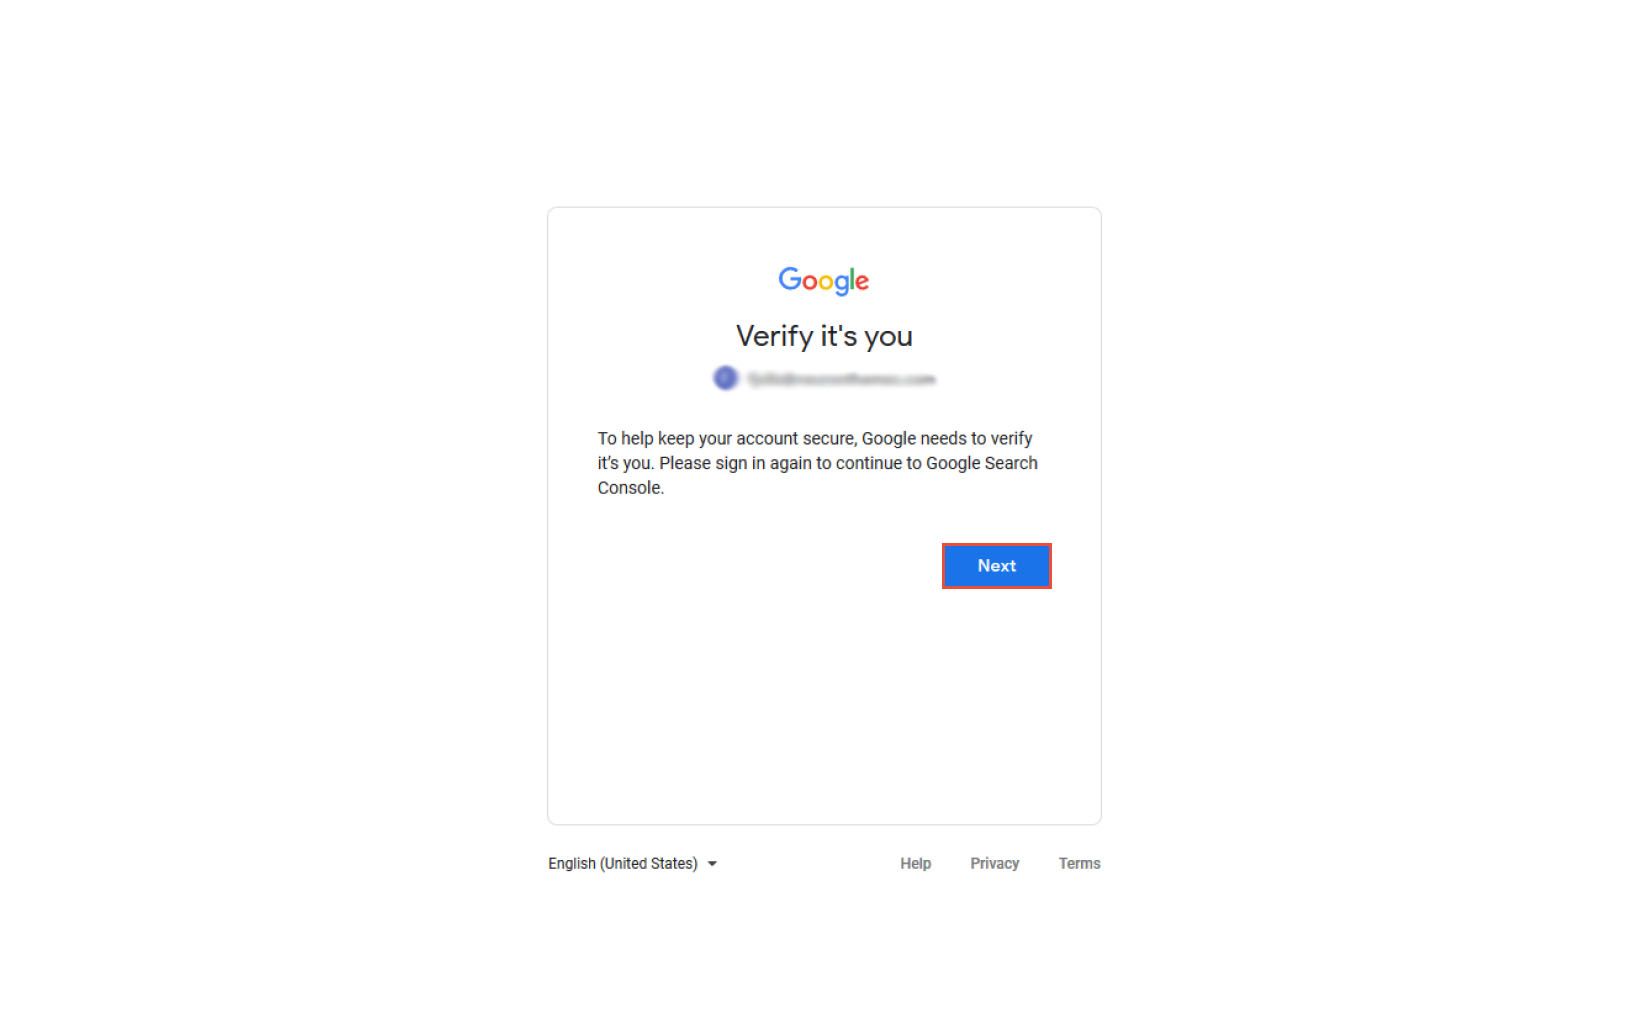
Next, you will need to sign in with your Google Account, pretty sure almost every one of you has a Gmail. Provide your personal info like email and password.
Once you have logged in this is where you will need to connect your website with Google Search Console, which will be as simple as providing your site URL in the designated field.
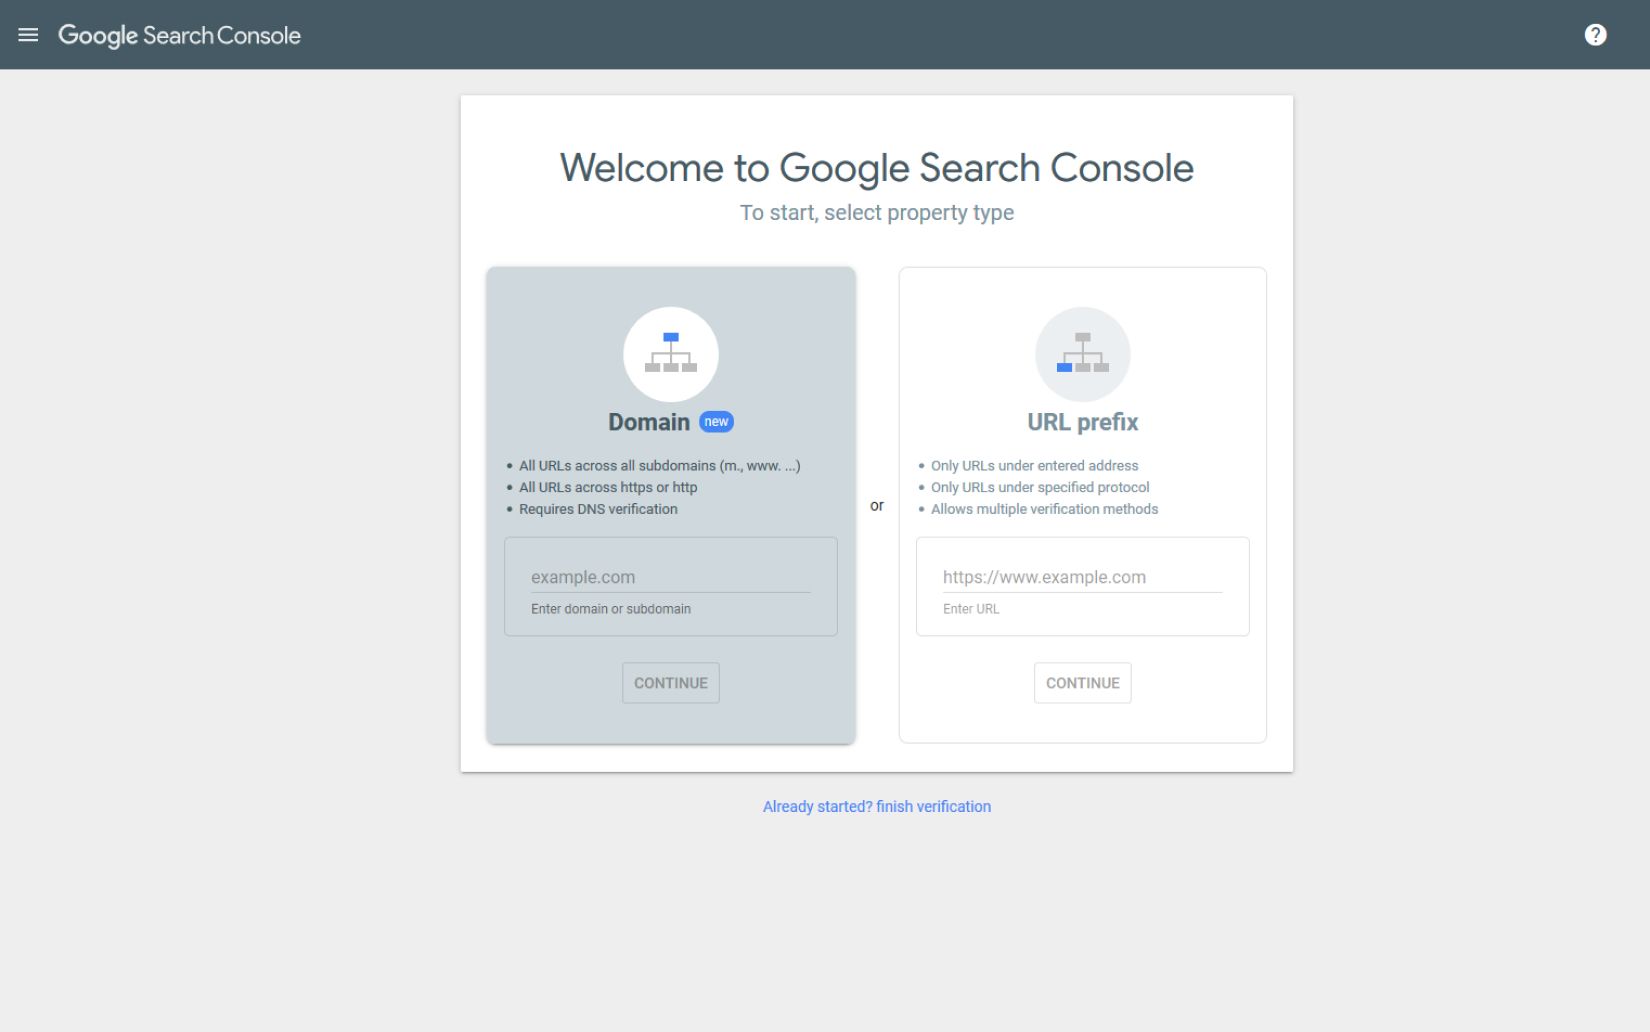
You can either choose to verify your website via the Domain Property which authenticates your site based on a domain-level property meaning with all your subdomains and multiple protocols.
Or you can verify your website via the URL Prefix – this will authenticate your site’s URL including the HTTP and HTTPS protocol.
Note that Google considers the HTTP and HTTPS as different protocols so make sure you type the correct one. To check your what your protocols are, go to your WordPress Dashboard and under Setting > General go to Site Address (URL) and there it will show you your URL.
If you are looking to have your site match all the subdomains and protocols you can add a domain instead.
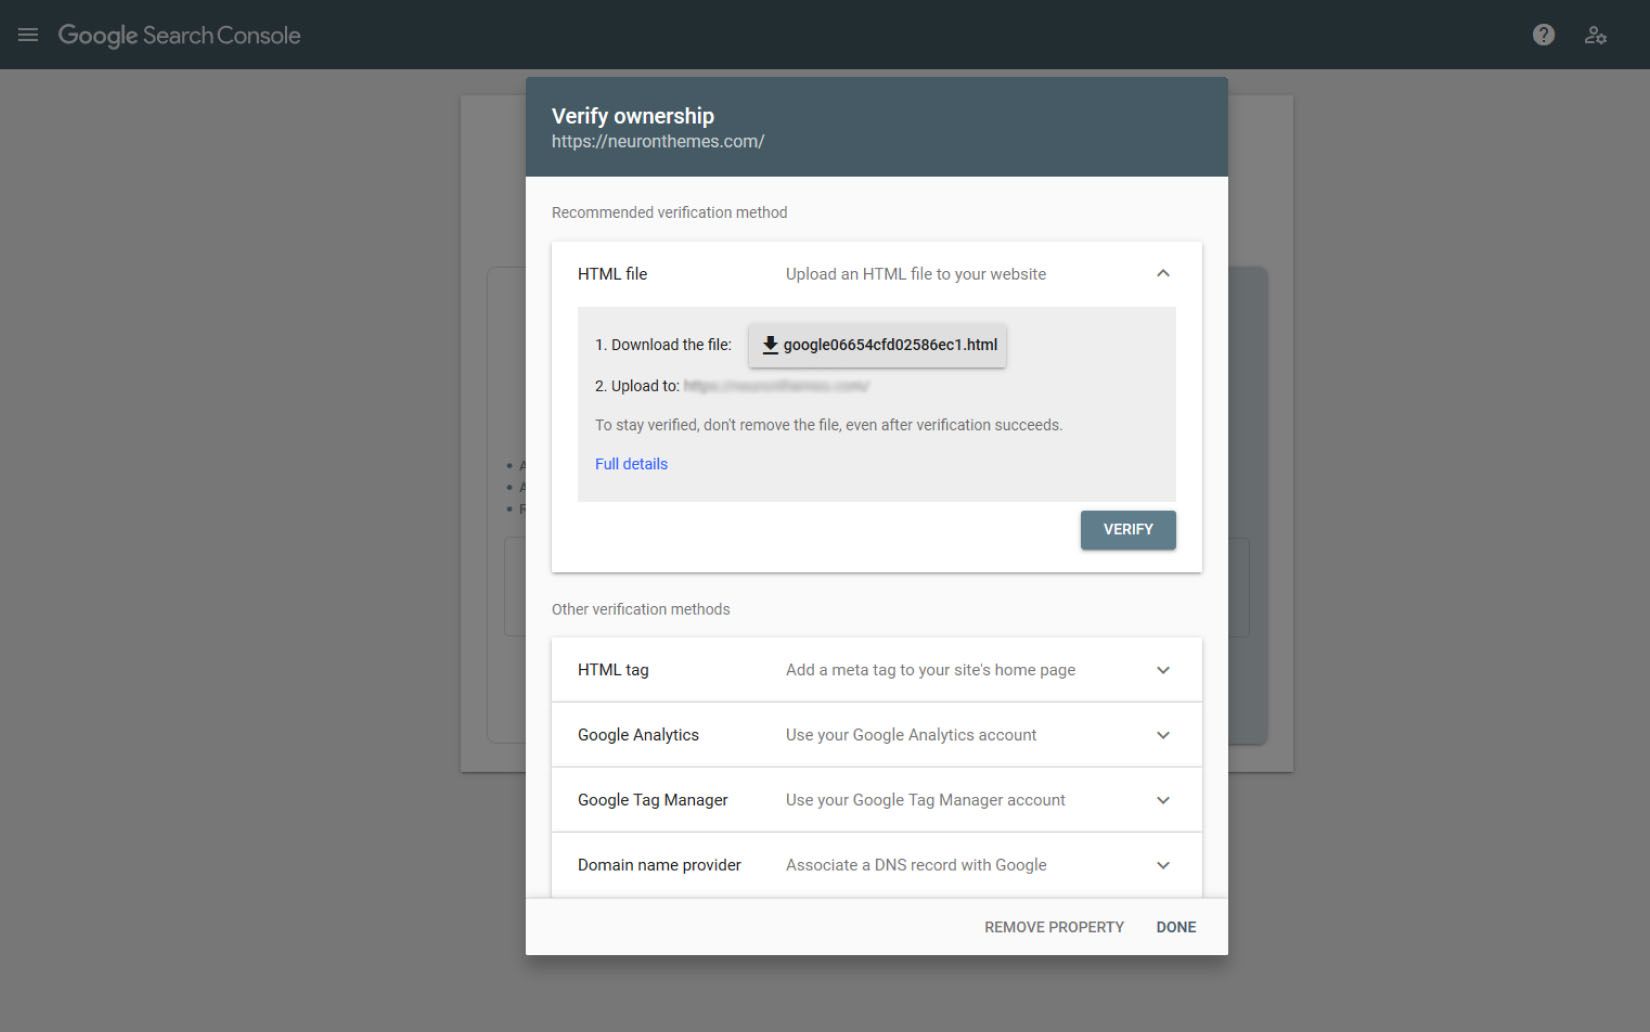
After entering your site’s either URL or domain you’ll be enticed to download the file and upload it to your website. You would need to do that via your hosting cPanel or connect your site to your hosting account via FTP. ad upload the HTML verification file into the /public_html/folder of your site.
Both of these methods can cause a bump on the road for those who are new to WordPress or those with less knowledge of coding. You could end up messing your website badly if done incorrectly.
We mentioned in the beginning that this will be a tutorial for novices and the simplest way to add Google Search Console is via the HTML tag options, located right under Other Verification Methods
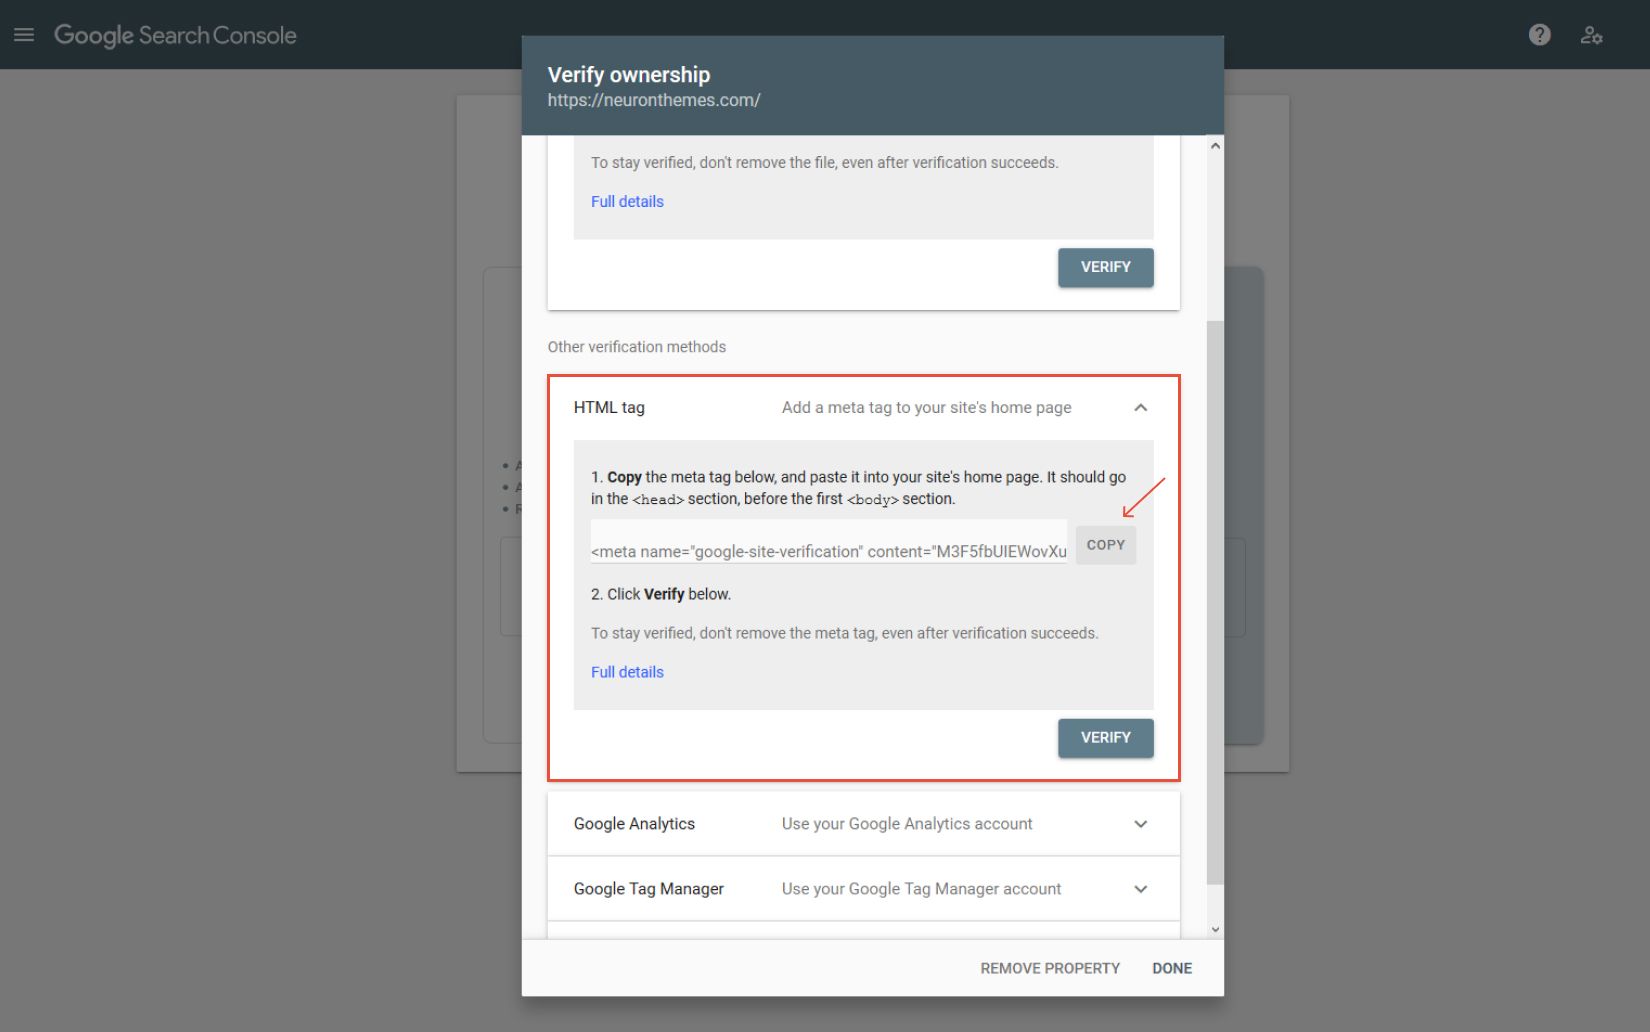
Click on the HTML tag to expand the window and there you will find the meta tag which you will need to copy and paste it into your website. Make sure to insert it in the <head> section, before the first <body> section
Worry no more, since we will use the help of a plugin to insert the meta tag exactly where it’s needed.
To proceed with the next step of the integration process, you will need to install Insert Headers and Footers plugin. To learn how to install a plugin we have created an article that explains it step by step.
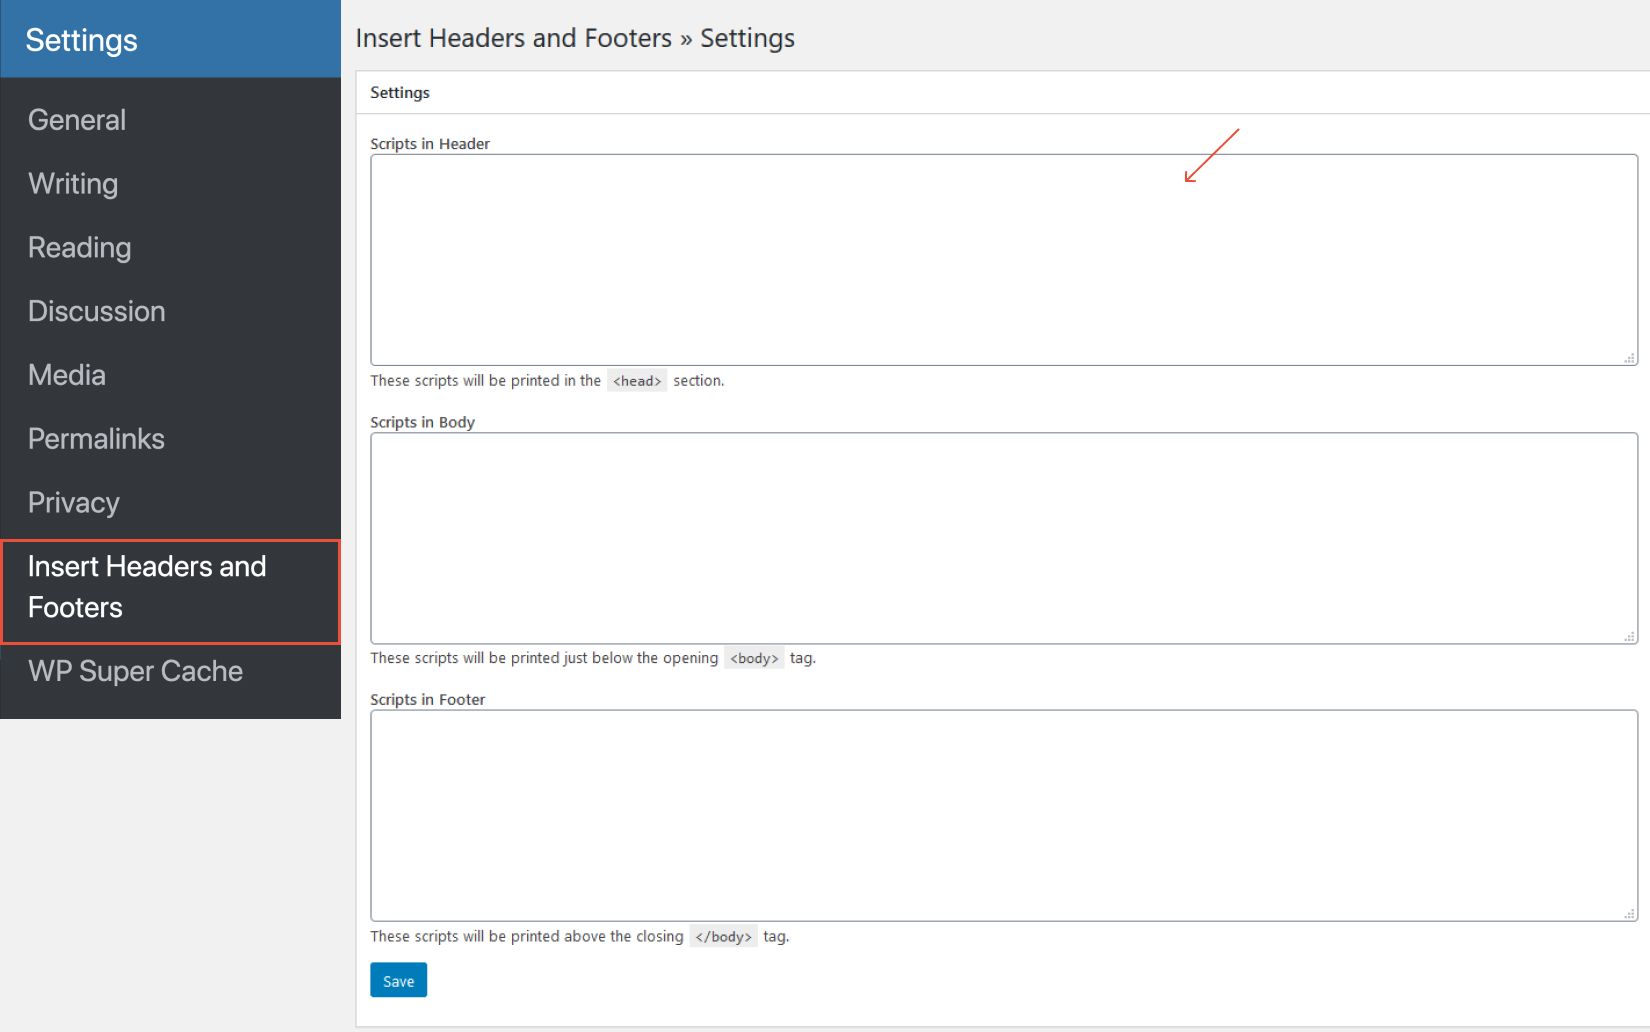
Upon activation of the plugin, you will be able to access it through the WordPress Dashboard > Setting > Insert Headers and Footers. The meta tag you copied will need to be inserted in the Headers field. Simple as that. Click on Save Changes after you’ve inserted the code.
Go back to the Google Search Console’s page and click on Done. After a successful verification, you can go and check the properties on your site for reports and insights.
How to connect Google Search Console and Google Analytics
Google Search Console and Google Analytics will prove to be a powerful duo that will help you maintain and monitor your website by analyzing data from the search console in Google Analytics.
You can gain a new perspective of data and insights and will step up your SEO game to new perspectives and points of view. But first, you will need to install again a plugin to help you simplify the process.
Monsterinsight is one of the best Google Analytics plugins that comes first of all free and with some helpful tools like keyword search even from Google Search Console.
Upon plugin installation and activation you will need to go to your Google Analytics page and from there you will need to locate the Admin section and click upon it.
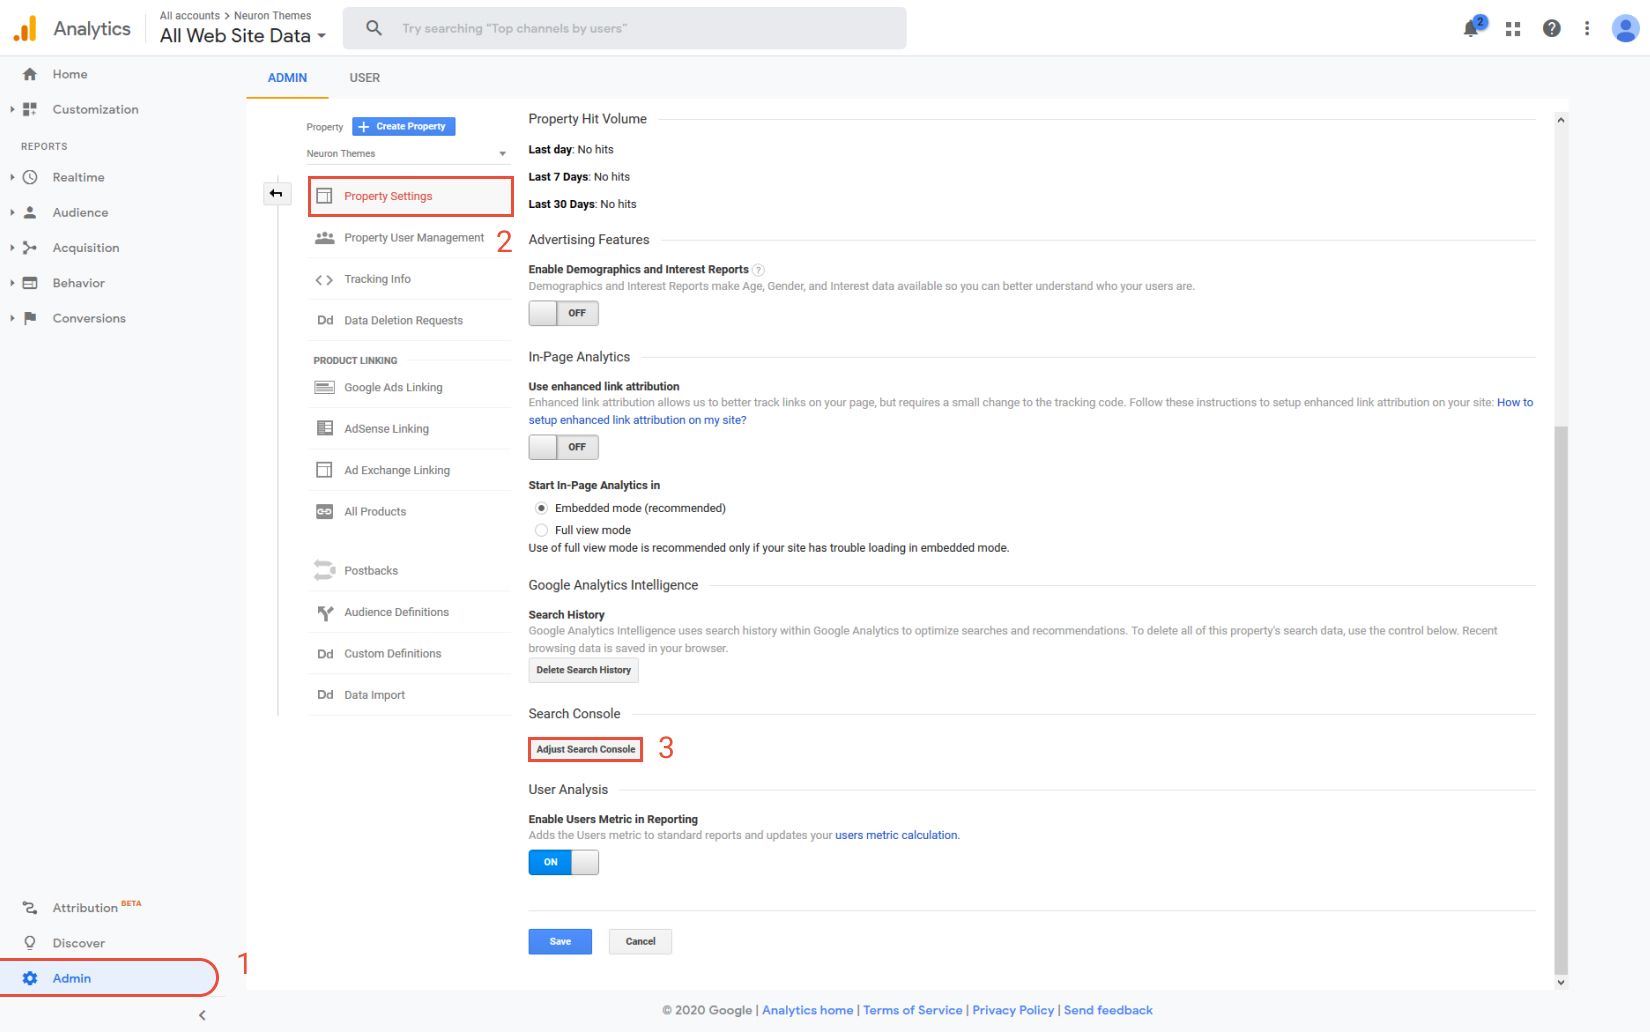
From here you will have access to all of the settings to adjust and configure your Google Analytics page. Next on you will need to locate the Property Settings option and click on it.
From there you will have to scroll down until you locate the Search Console section, once you find it, click on the Adjust Search Console button

On this next screen, you will need to click on the Done button and by now you should be able to the list of websites you have added to the search console – that says you have added more than one site. Select the website you would want to connect with Google Analytics and hit the Save button.
That should be about all, you have successfully linked your Google Search Console and Google Analytics. Take advantage of the power of knowledge and insights you will gain to improve your site’s performance.


