After establishing your website, it is of pivotal importance that your website is visible on all search engines and you have to step up your A-game to reach the highest ranking spots on all search engines.
You can start by following all the best practices to search engine optimization and configure your website to meet all the standard criteria. Pinterest is the world’s third-largest search engine after Google and YouTube.
If you wish to enlarge your audience reach and have a large impact on your website, having your website verified on Pinterest, will drive you more organic traffic from Pinterest to your website. If you verify your WordPress website on Pinterest, you will unlock neat features like Pinterest analytics, ads program, stats for your photos, and more.
This is why in this article we will be showing you how to verify your WordPress website on Pinterest step by step. Follow our detailed guide to have your website be visible across the web, including Pinterest.
Why You Should Verify Your WordPress Website on Pinterest?
Pinterest is one of the most popular social media platforms to share photos, videos, and other visual content. Once you are on Pinterest you can easily create an account, upload images and manage them similar to other platforms on the web.
You can beautifully organize your content on Pinterest by creating boards If you are running a photography website or any other type of blog with images and videos, then Pinterest can be an important source of traffic.
If your website focuses on visual arts such as photography or an eCommerce store, Pinterest can significantly increase your web traffic and brand visibility. If you verify your WordPress website on Pinterest you will be able to gain access to some very useful features like Pinterest Analytics where you can gain insights into your visitors and their activity.
You can also participate in their ad program as well as create strategies to enlarge your reach on Pinterest. Now it’s time to reveal the comprehensive guide on how you can achieve the Pinterest verified WordPress website.
How to Easily Verify Your WordPress Site With Pinterest?
Step 1. Upgrade Your Pinterest Account to Business
We’ve already noted that you need to have an account on Pinterest and have the account be upgraded to a business account. A Pinterest business account lets you gain access to a lot of Pinterest benefits that you wouldn’t have otherwise, including boosting brand authority, driving traffic, the ability to create and display ads, access to Pinterest insights, and more.
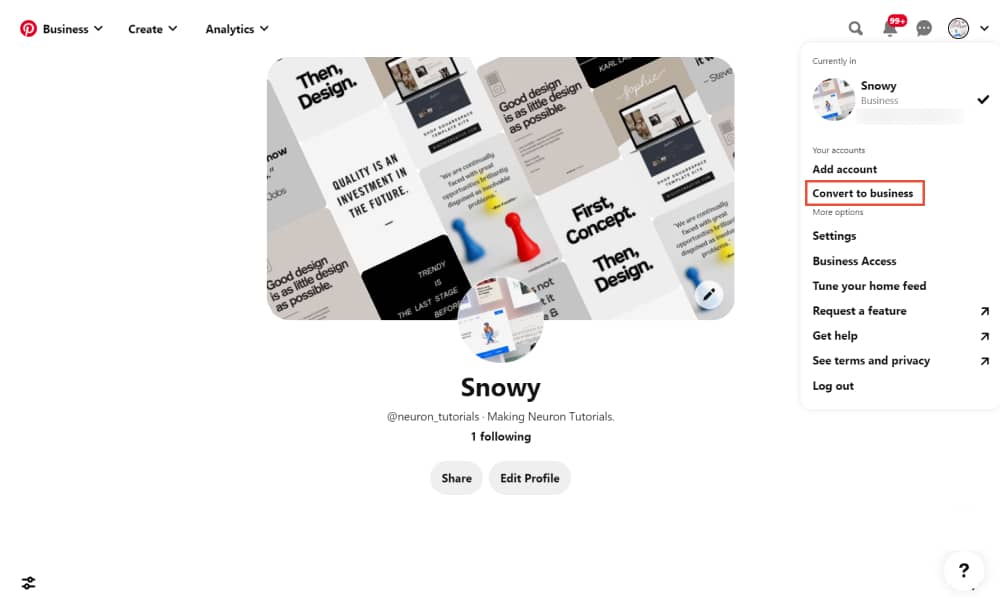
The best of it is that a business account is free and easy to set up. By default every account that’s created in Pinterest is a personal account, you will need to upgrade it to a business account. To do that Log in to your Pinterest account, go to the top right corner, and click the dropdown arrow.
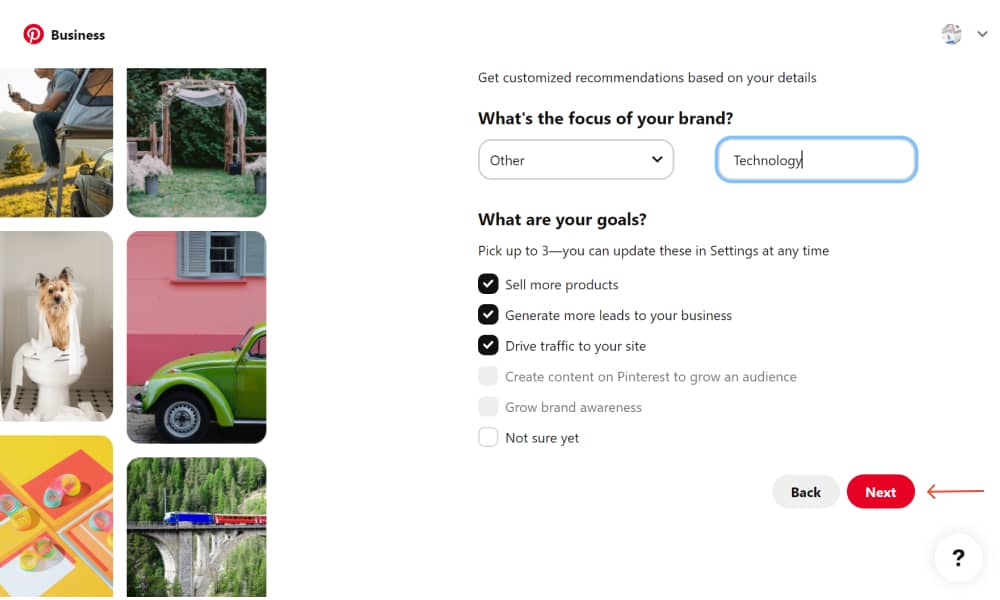
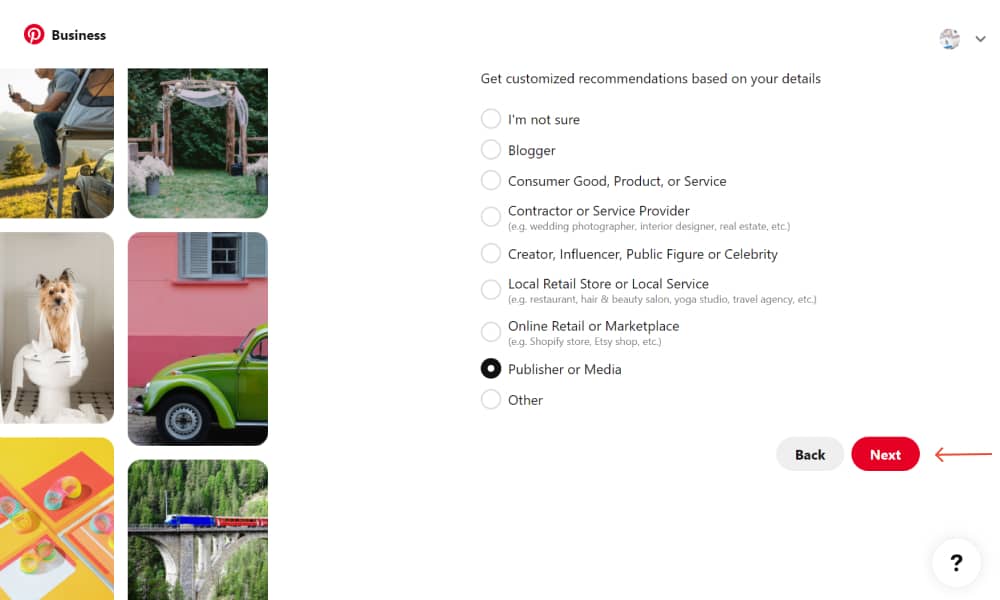
Here you need to click the Convert to Business link. Now to begin the verification process, first of all, you need to log into your Pinterest account and click on the down arrow at the top right corner of your screen. Next, click on the ‘Convert to business’ option.


Step 2. Claim Your WordPress Website on Pinterest
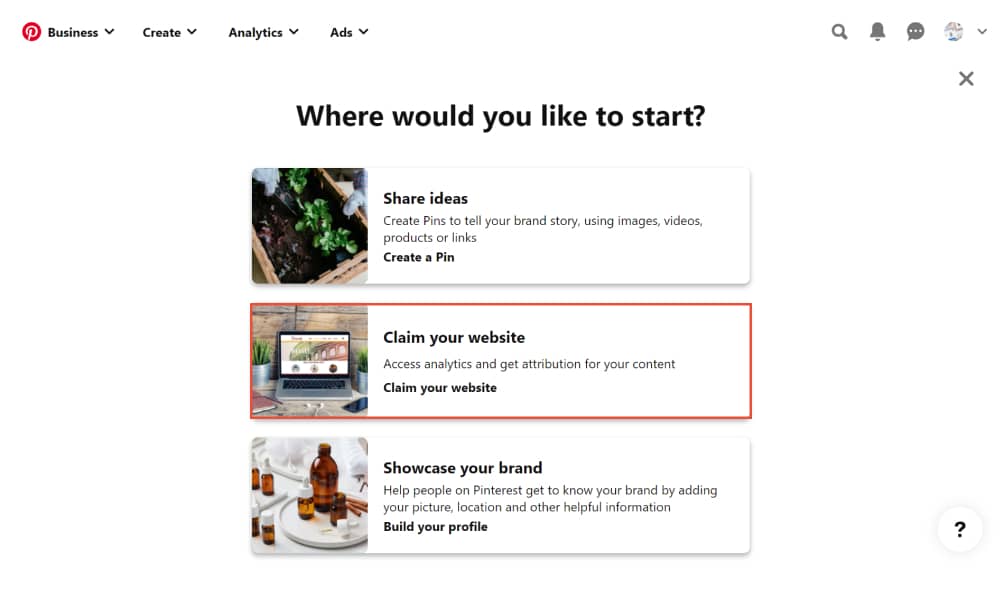
The next step is to claim your WordPress website on Pinterest. This will be the second step you need to make to verify your WordPress website on Pinterest. To begin the process, click on the ‘Claim domain’ button from your Pinterest Business hub page, and it will directly take you to the claim settings page, or alternatively, go to Settings > Claim.
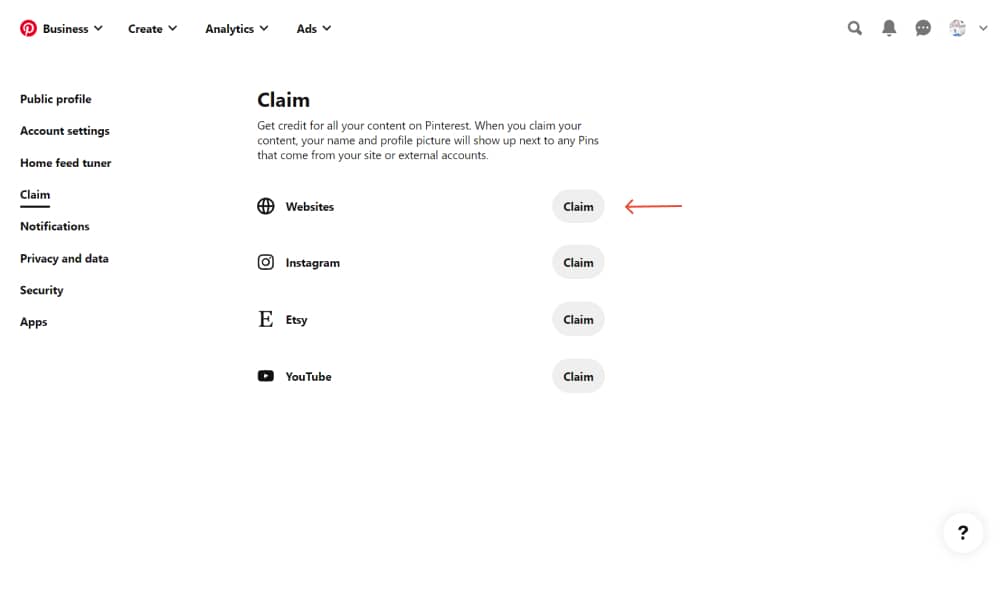
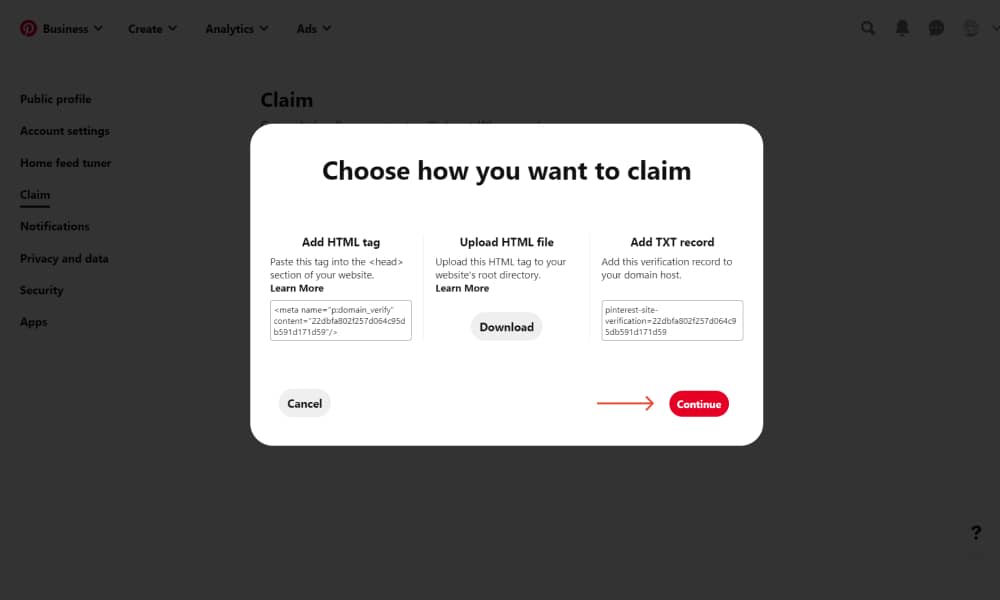
Once you click o nthe Claim button, you will see a window appearing containing a few options to finalize the process of getting a Pinterest verified WordPress website. You can see 3 methods including:
- Add HTML tag — simply add an HTML code snippet to your website’ssection.
- Upload HTML file — download an HTML file and upload it to the root directory of your website using an FTP client or your WordPress hosting file manager.
- Add TXT record — add a verification record to your domain host using your domain registrar.
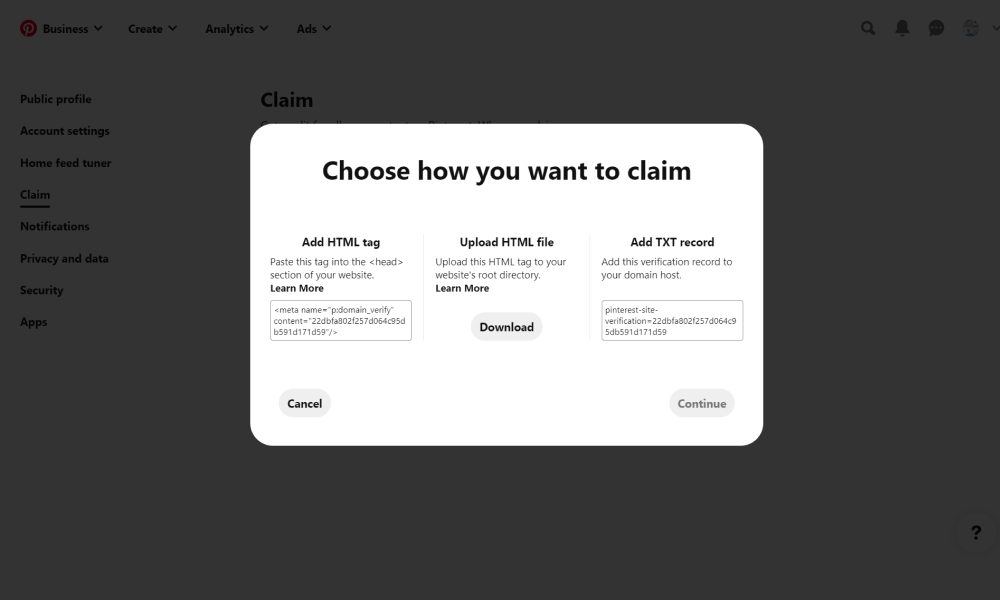
We are going to choose the first option, which is to add an HTML tag because it is the easiest option, however, you can choose one of the mentioned options depending on your preferences.
Step 3. Add HTML Tag to Your WordPress Website
There are plenty of ways to do this and you can install and activate different plugins for the job. We will first show you how to do that using RankMath, one of the best SEO WordPress plugins, we recommend you use this approach if you are already using RankMath as your search engine optimization solution, as you will not install another WordPress plugin and add it to the list to overload your website.
To verify your WordPress website on Pinterest via RankMath, grab the HTML code and paste it in Rank Math > General Settings > Webmaster Tools > Pinterest Verification ID.
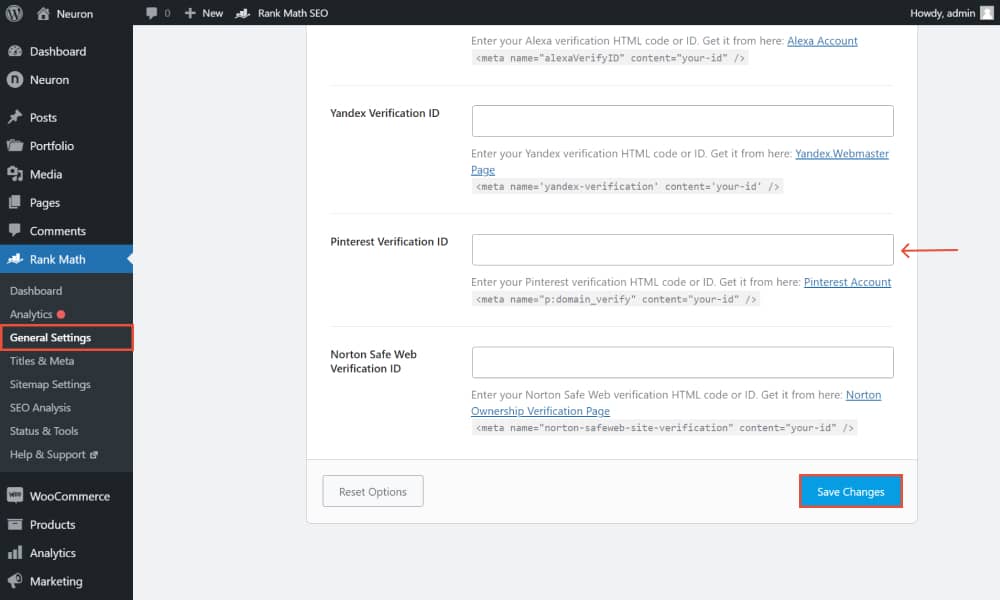
Once everything is set and in place, click on the Save button to save the change and let RankMath deal with the rest. This means you will have a Pinterest verified WordPress website.
Another alternative is by using the All in One SEO (AIOSEO) WordPress plugin and entering the HTML tag to your website in order to verify your WordPress website on Pinterest.
AIOSEO is an amazing plugin, to get started install and activate the plugin. To add the HTML tag, go to All in One SEO » General Settings and then click the ‘Webmaster Tools’ tab from the top menu. After that, click the ‘Pinterest Site Verification’ block.
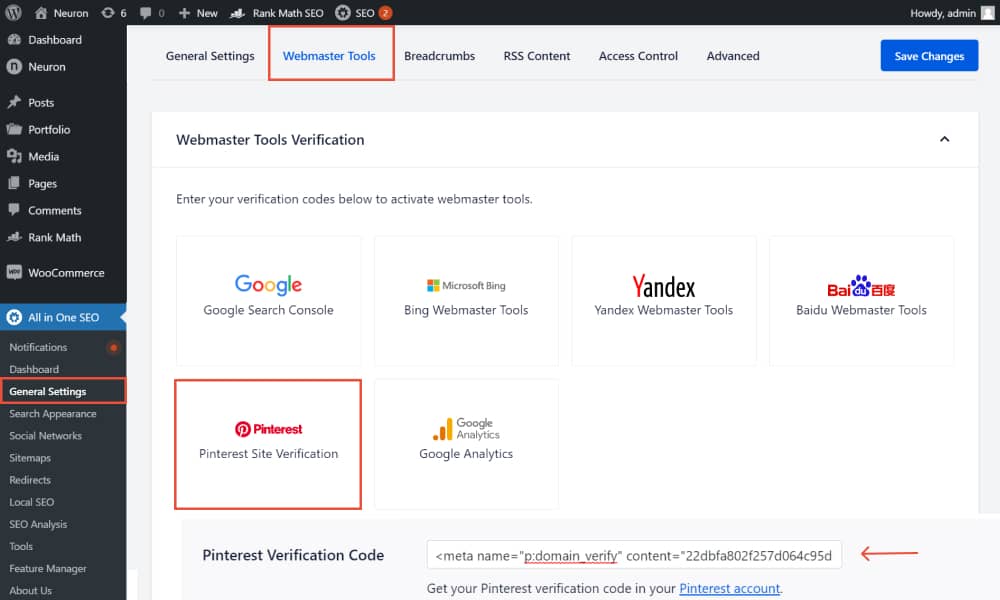
Now you need to enter the HTML tag you copied in the previous step in the Pinterest Site Verification field. Once everything is set in place, click on the Save Changes button. Now go back to Pinterest and click on the Continue button.
It will now ask you to enter the URL of your website and then click the ‘Verify’ button.
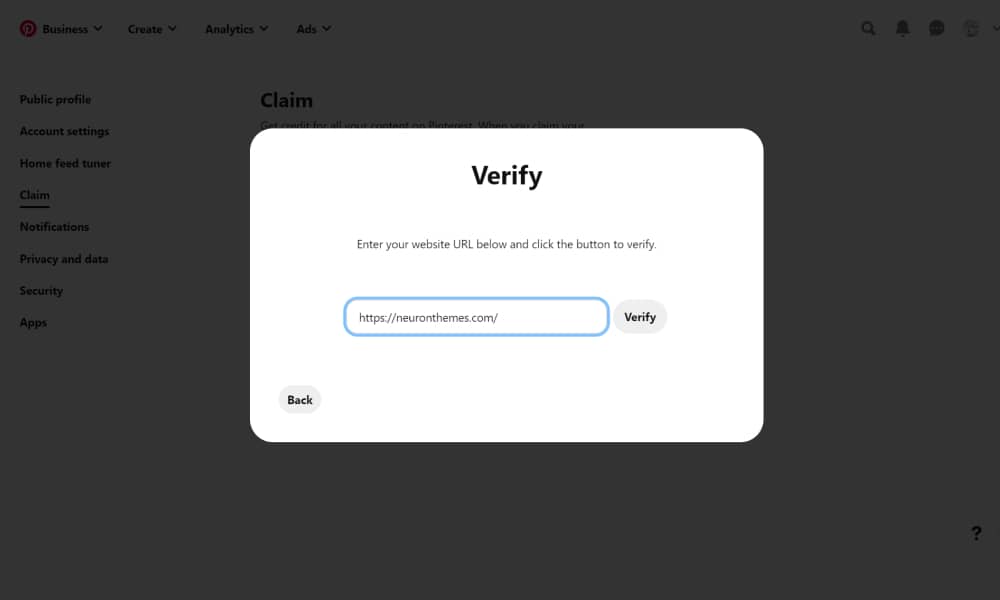
Once you verify your WordPress website on Pinterest you will see a message saying ‘Verification in progress.’ This usually takes up to 24 hours and you will receive your website’s verification. Now, this is all on how to verify your WordPress website on Pinterest.
Final Thoughts
Now we’ve concluded our article on how to verify your WordPress website on Pinterest and hope that this guide helped you along your journey on verifying your website. Having your website verified on Pinterest will help you gain insights and analytics as well as get credit for the content you post on this platform.
You can easily use the Pinterest tools like analytics, image stats, ads program, etc. After you’ve learned the importance of Pinterest as a large platform to drive traffic to your website, verifying your site to Pinterest should be quite easy, especially using our comprehensive guide as a model to get you started.


