When building a solid SEO strategy for your website, sitemaps are an important factor that must be considered at all costs because that’s how bots crawl for content on your website, and a well-structured sitemap provides a clear path to everything your website contains The two most important sitemaps to create for your website are XML sitemaps and HTML sitemaps pages.
Both of these sitemaps ensure clear navigation across your website for both search engines and your site’s visitors. For this article, we will cover how to create an HTML sitemap page in WordPress using a WordPress plugin.
The process is simple and straightforward, and these plugins also offer a powerful set of tools and features to establish visibility on all search engines and improve your site’s rankings. There’s a clear difference between XML sitemaps and HTML sitemaps, as both contain the entire structure of your website, except each, is present in different languages and serves different audiences.
The XML sitemap is usually created for search engines, while an HMTL sitemap is created for users to offer them clear navigation of your website. A sitemap is a file or a special webpage that lists all your website’s content in an HTML or XML format.
What is an HTML Sitemap?
An HTML sitemap is a hyperlinked web page on a website that provides the entire site’s structure outlining every page existent. Creating an HTML sitemap page will be beneficial for both your website in terms of search engine optimization as well as your visitors because it provides them with navigation wherever they might be struggling to find a certain page on your website.
By building an HTML sitemap page you will be able to provide your users with a hyperlinked outline of all your pages and they will easily spot the content they need. This results in a good user experience, which ultimately is a great indicator for Google and other search engines that your website is worth visiting.
If you provide clear navigation menus on your website, users should be able to wander through your site easily, but in cases where a website is filled with links and pages and provides a complex structure, navigation might still be challenging, that why providing an HTML sitemap page will ease this process.
You should be able to create an HTML sitemap page quite easily in WordPress using the powers of popular plugins that are excellent for the job. You do not need to create your HTML sitemap manually, as that will take you a long time, and you’ll be wasting your precious time on things that can be figured out easily when in reality you can concentrate your attention on creating better content and improving your website.
HTML sitemaps are a more visual type of sitemap that lists all your website’s links to help visitors navigate easily on your website. You might see partial HTML sitemaps integrated onto the footer area, as they don’t necessarily include every single page on your website. You might decide to include all the most important pages and links on your sitemap, which we will see in the next sections.
What is the difference between XML and HTML Sitemaps?
Until you pay close attention to them, you might confuse HTML and XML sitemaps, and due to the fact that both provide in part the same functionality on your website, there is no wonder people muddle between the two terms. But there’s a clear distinction between XML and HTML sitemaps.
For starters, an XML sitemap is a file that lists all the URLs on your website that you want to publicly display. An XML sitemap helps search engines like Google and others to crawl and index your page by providing a “map” of your website. You can submit your XML sitemap in webmaster tools to be visible for search engines. This way you will have your site’s entire structure be indexed by crawl bots. Submitting your XML sitemap will have its benefits on SEO.
While on the other hand, we explained that an HTML sitemap page will consist of a hyperlinked outline of links and URLs that will help the user navigate through your site’s page much easier and with much more efficiency. So to differentiate, an XML sitemap is designed for search engines, while an HTML sitemap is created for users.
Now that we’ve made the difference between XML and HTML sitemaps clear, it’s time we move onto the tutorial on how to create an HTML sitemap page in WordPress using the help of a plugin. In the latter sections of this article, we will also be providing a list of some other alternative plugins aimed to help you create HTML sitemaps with utmost ease and flexibility. Read on.
How to add an HTML sitemap page in WordPress using a plugin?
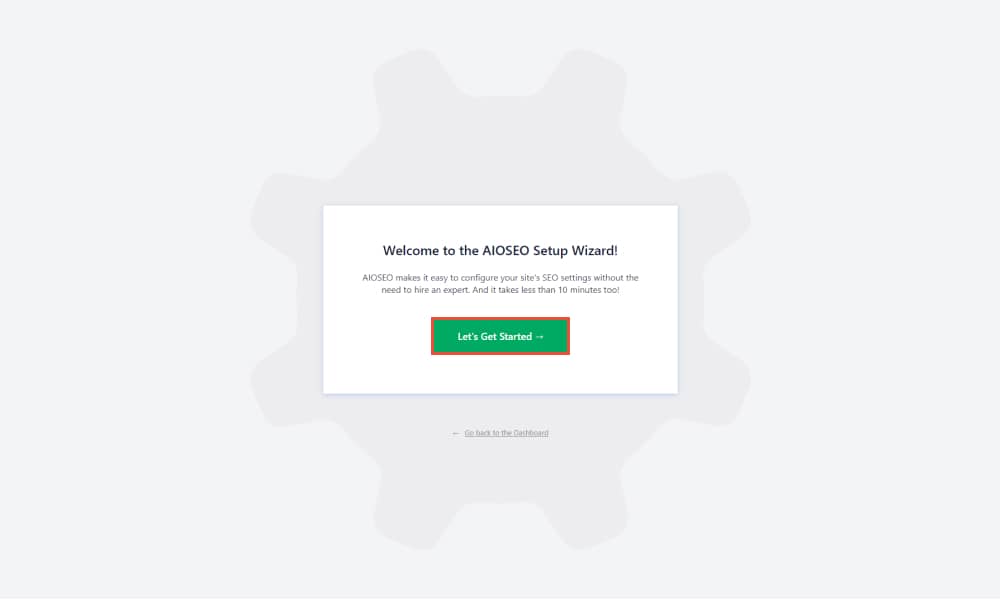
There you can choose the category of your website, the homepage title as well as the homepage meta description. The wizard is made up of several steps. Go through each of them and configure the main settings. Once you’ve finished the set up you’ll be redirected to the WordPress Dashboard. Click on All in One SEO > Sitemaps. Here you will find located all the configurations regarding sitemaps. Before we continue make sure you have the Enable Sitemap option ON.
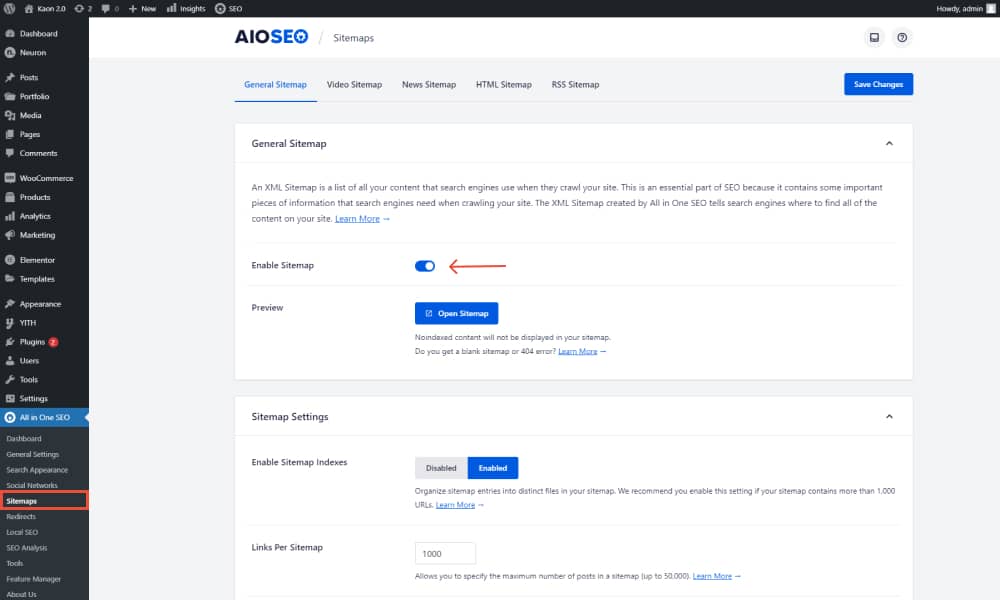
Next, click on the HTML Sitemap tab and here you will be able to select how your HTML sitemap page will be displayed as. We will select on Dedicated Page. On the Display the sitemap on a dedicated page file type in the URL of your website / the slug of the URL sitemap page. The plugin will automatically create a new HTML sitemap page.
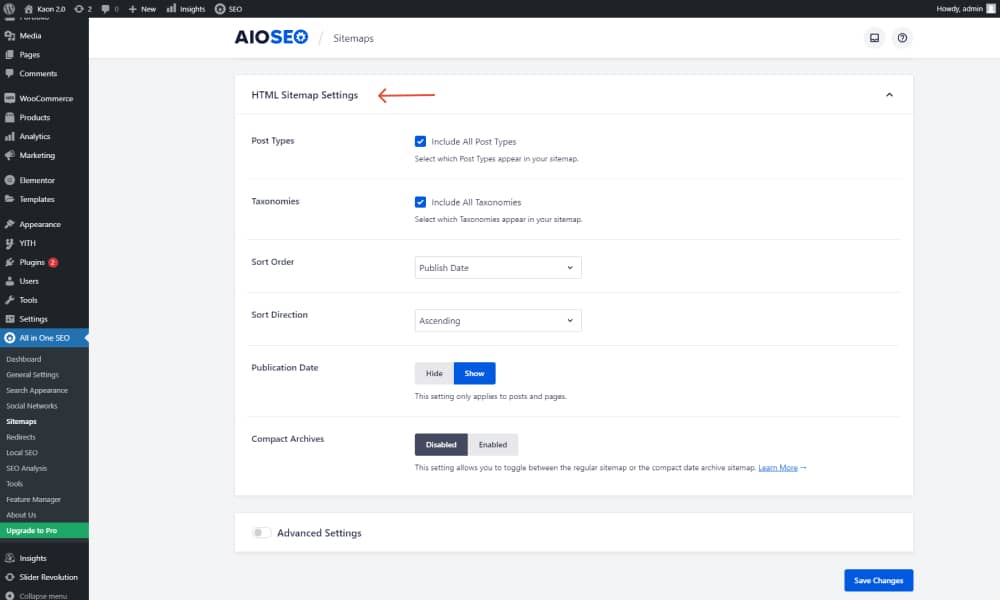
After you’ve created your HTML sitemap page in WordPress, scroll down to find the HTML Sitemap Settings section. Here you will have to tweak a few configurations as well to get the best results out of the plugin. Here you can choose if you want to include all posts or specify the ones you wish to include.
The same is applied for taxonomies as well, if you do not wish to include all the taxonomies ( categories, tags ) you can uncheck the setting and then manually select the taxonomies you want to include. You can sort the order of the links and pages included, choose whether or not you wish the publication date to be displayed, or compact date archive sitemap. For more detailed configuration, click to expand the Advanced Settings

Once you are done with all the configuration click on Save Changes and your HTML sitemap page will be live on your WordPress website. Your visitors will be able to visit the sitemap and navigate through pages with ease. Type in the URL you just created for the HTML sitemap and you’ll have an HTML version of every page on your website (unless you’ve specified targetted pages to be displayed only). They will be categorized based on their taxonomy. The design will be set to a default aesthetic based on the style of your active theme.
Second Method: How to Create an HTML sitemap with WP Sitemap Page?
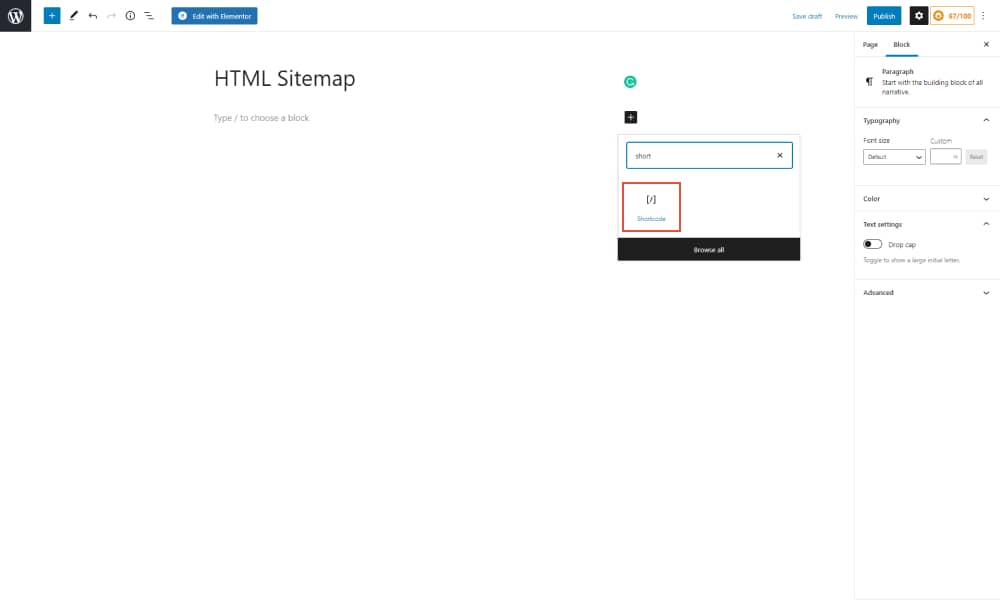
Step 3: Using the shortcode block, make sure you insert this code [wp_sitemap_page], click on the Publish button at the top right corner of the page for the changes to be applied and your page will be live.
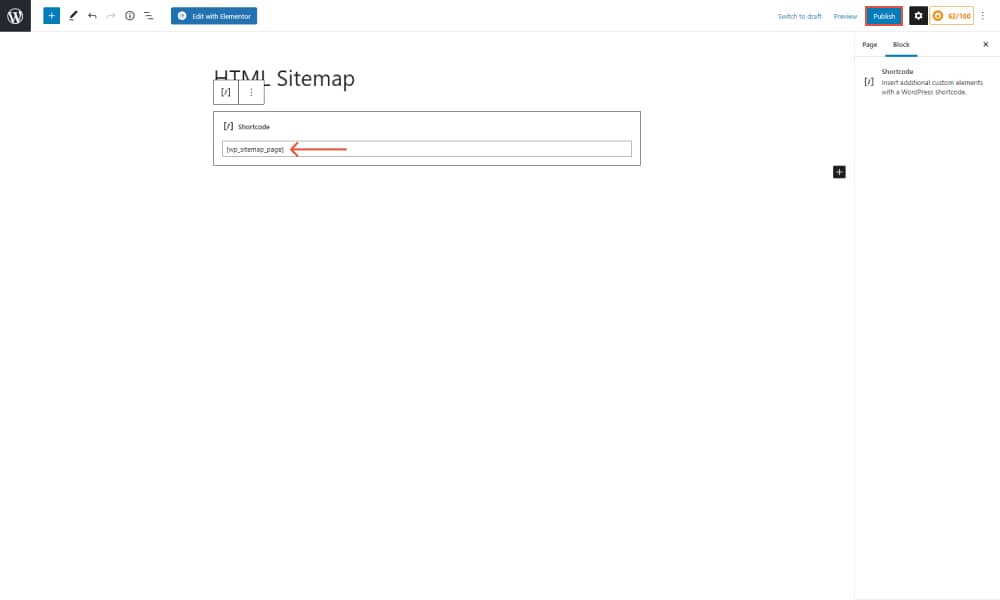
Preview the page on another tab. And you will be able to see the HTML sitemap structure there. Included are all the pages and links you have active on your WordPress website. Once again the design is set on a default basis depending on the theme that’s active on your site.


